Have you always wanted to play with off-grid water systems? Have you dreamt of total independence from the vagarities of municipal water systems, from submersible well pumps, or from, say powered water systems altogether? Do you aspire to water your carnivorous plants with real spring water? None of those ideas have illuminated my imagination, but I’ve put together such a system anyway.
A relative recently purchased a large forest lot on the side of a mountain. The place is pretty and not that far from a town, but completely without access to electrical and water grids. That family member’s aspiration was live on the plot of land, but some basics would need to be installed first.
While on holiday this spring, I completed the development of a gravity fed spring water system, plumbed a shed/house on the property, then installed a solar system. Totally normal vacation activities, right?
Design Considerations
It turns out that remote properties do not come with owners’ manuals replete with directions for creating off-grid water systems. As a result, researching how and what to install was, at times, fraught. Here are my notes on what has worked for me. If considering something similar, keep in mind my design considerations:
- Minimize material cost. I didn’t know if the system would work, all or in part, so using materials that could be used elsewhere and which weren’t particularly costly was helpful.
- Use off-the-shelf products where possible. Commodity poly bulkheads were a huge asset in this project, for instance.
- Avoid laborious solutions and heavy materials. I was the ditch digger, plumber, and engineer for everything seen here. I had a strong desire to avoid, say, hauling cement and rebar into the hills or hand trenching to bury hundreds of feet of tubing.
- Be as low-maintenance and easy to maintain as possible given above constraints.
While the materials and techniques I used work fine so far, you may want to prioritize other considerations in your projects that did not enter into my calculations. Designing a system that could survive being trampled by a moose, or be subjected to prolonged freezing temperatures, for instance, were beyond the project scope.
System Basics
Most spring water systems have three major components: A collector at the spring that directs water flow into a pipe, a spring box to remove major sediment contamination, and a storage vessel to ensure adequate water provisioning to the point of use. This system contains those three elements, plus 600’ of 1” poly pipe connecting the whole thing.
Water Collector
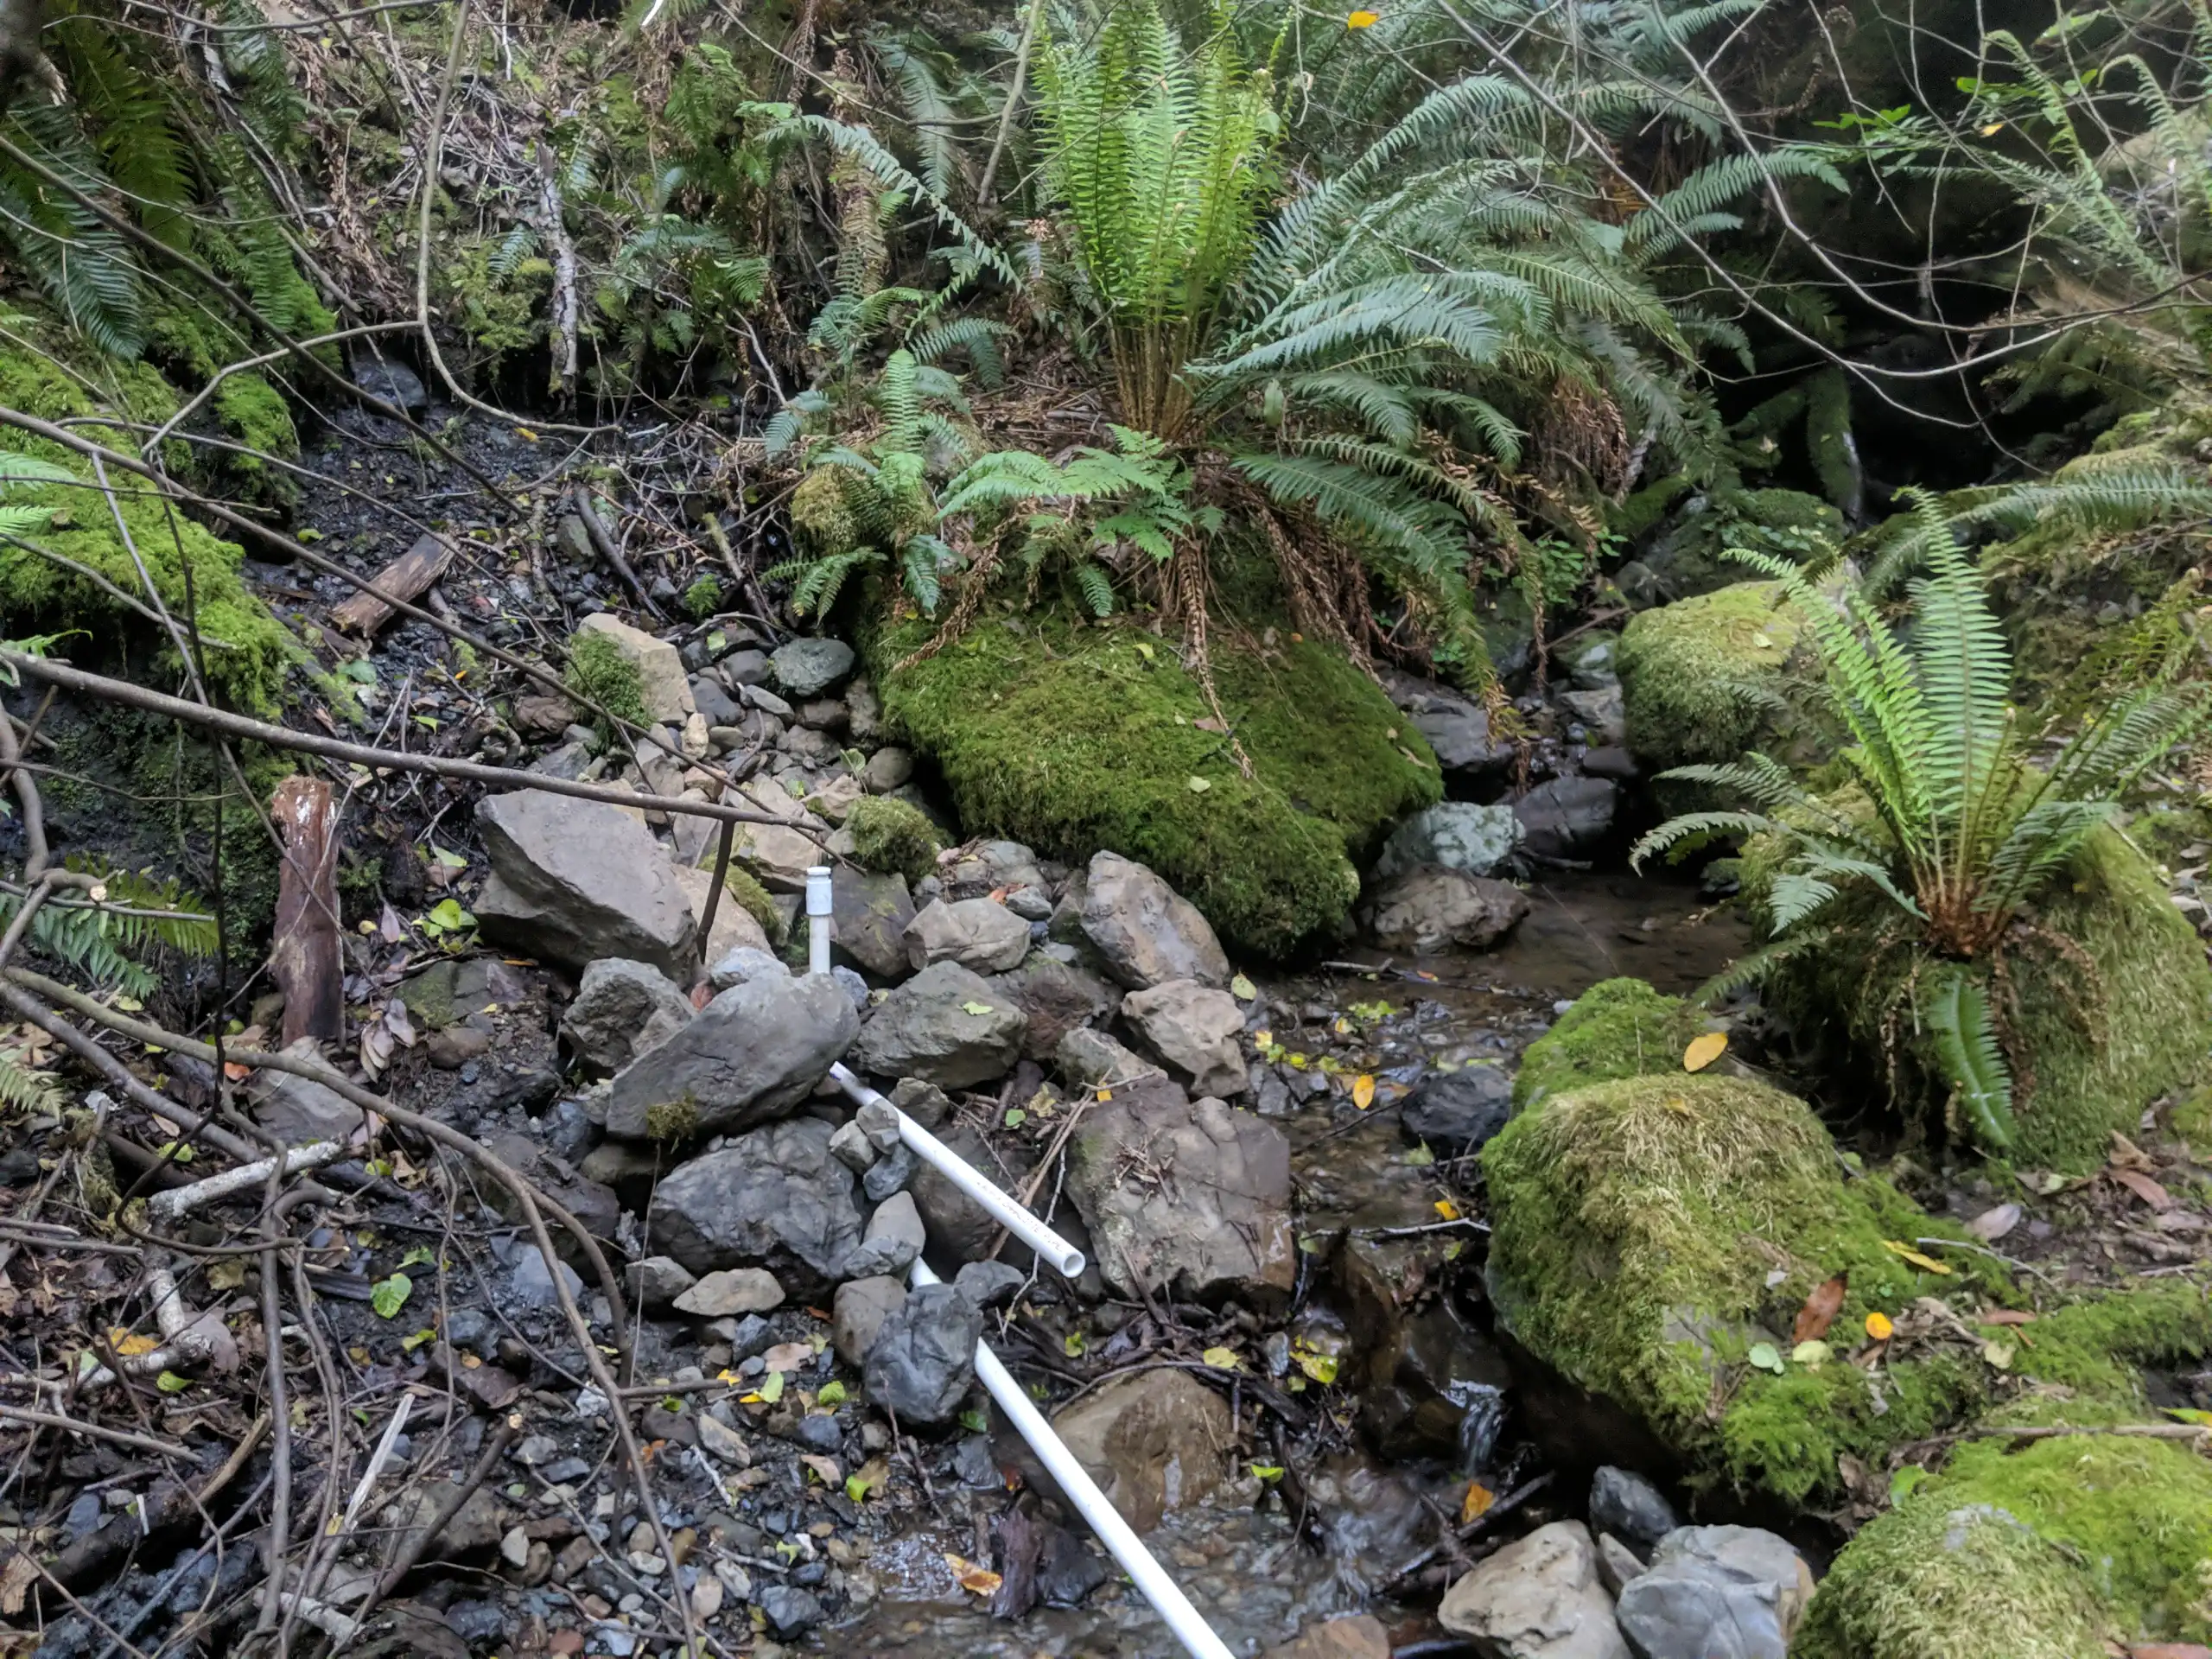
In the image above, the spring can be seen on left, on the edge of a creek. I installed the collector in the fall, at the height of the dry season. During much of the rest of the year, locating a year-round spring would be far more complicated.
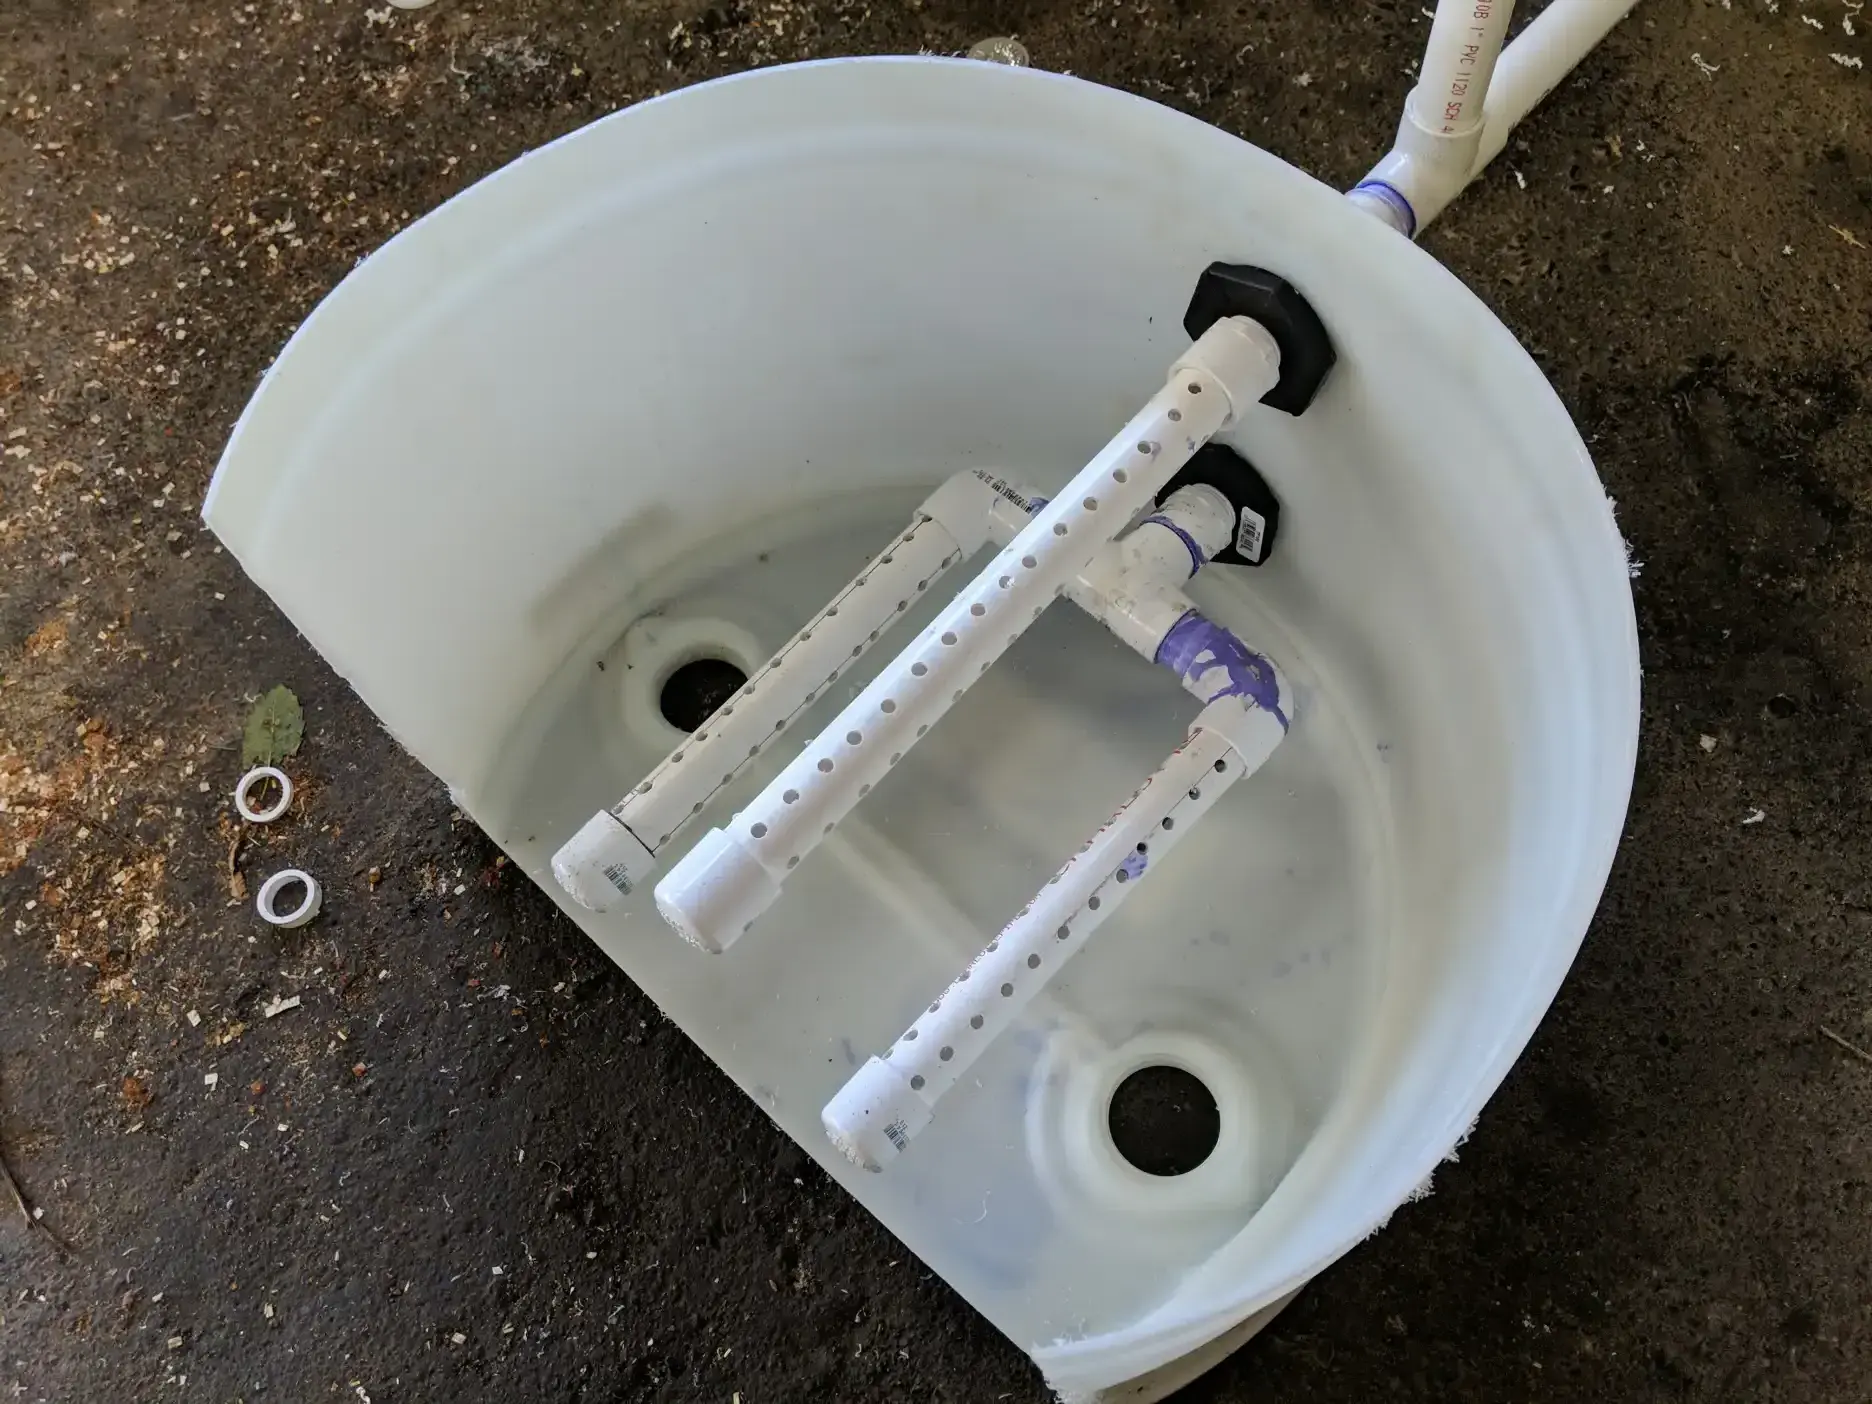
This is the collector design that I used in the spring above, and also in a more-recent stream water collector at a different property. Rather than building a full dam of some variety to hold back water, a section of poly material is used as a bulwark to both hold back incoming water and as a place to mount intake tubing via commodity poly bulkheads. I used the top of a 55 drum for this one. The bottom parts of the drums found purpose as Sarracenia bog containers.
The floor in the bulwark assembly is not necessary. The spring installation above only uses the bulwark wall, without any floor. That area and the entire interface with the stream will be sealed with clay, so any water-proofing function is irrelevant. However, the floor does help with rigidity during installation.
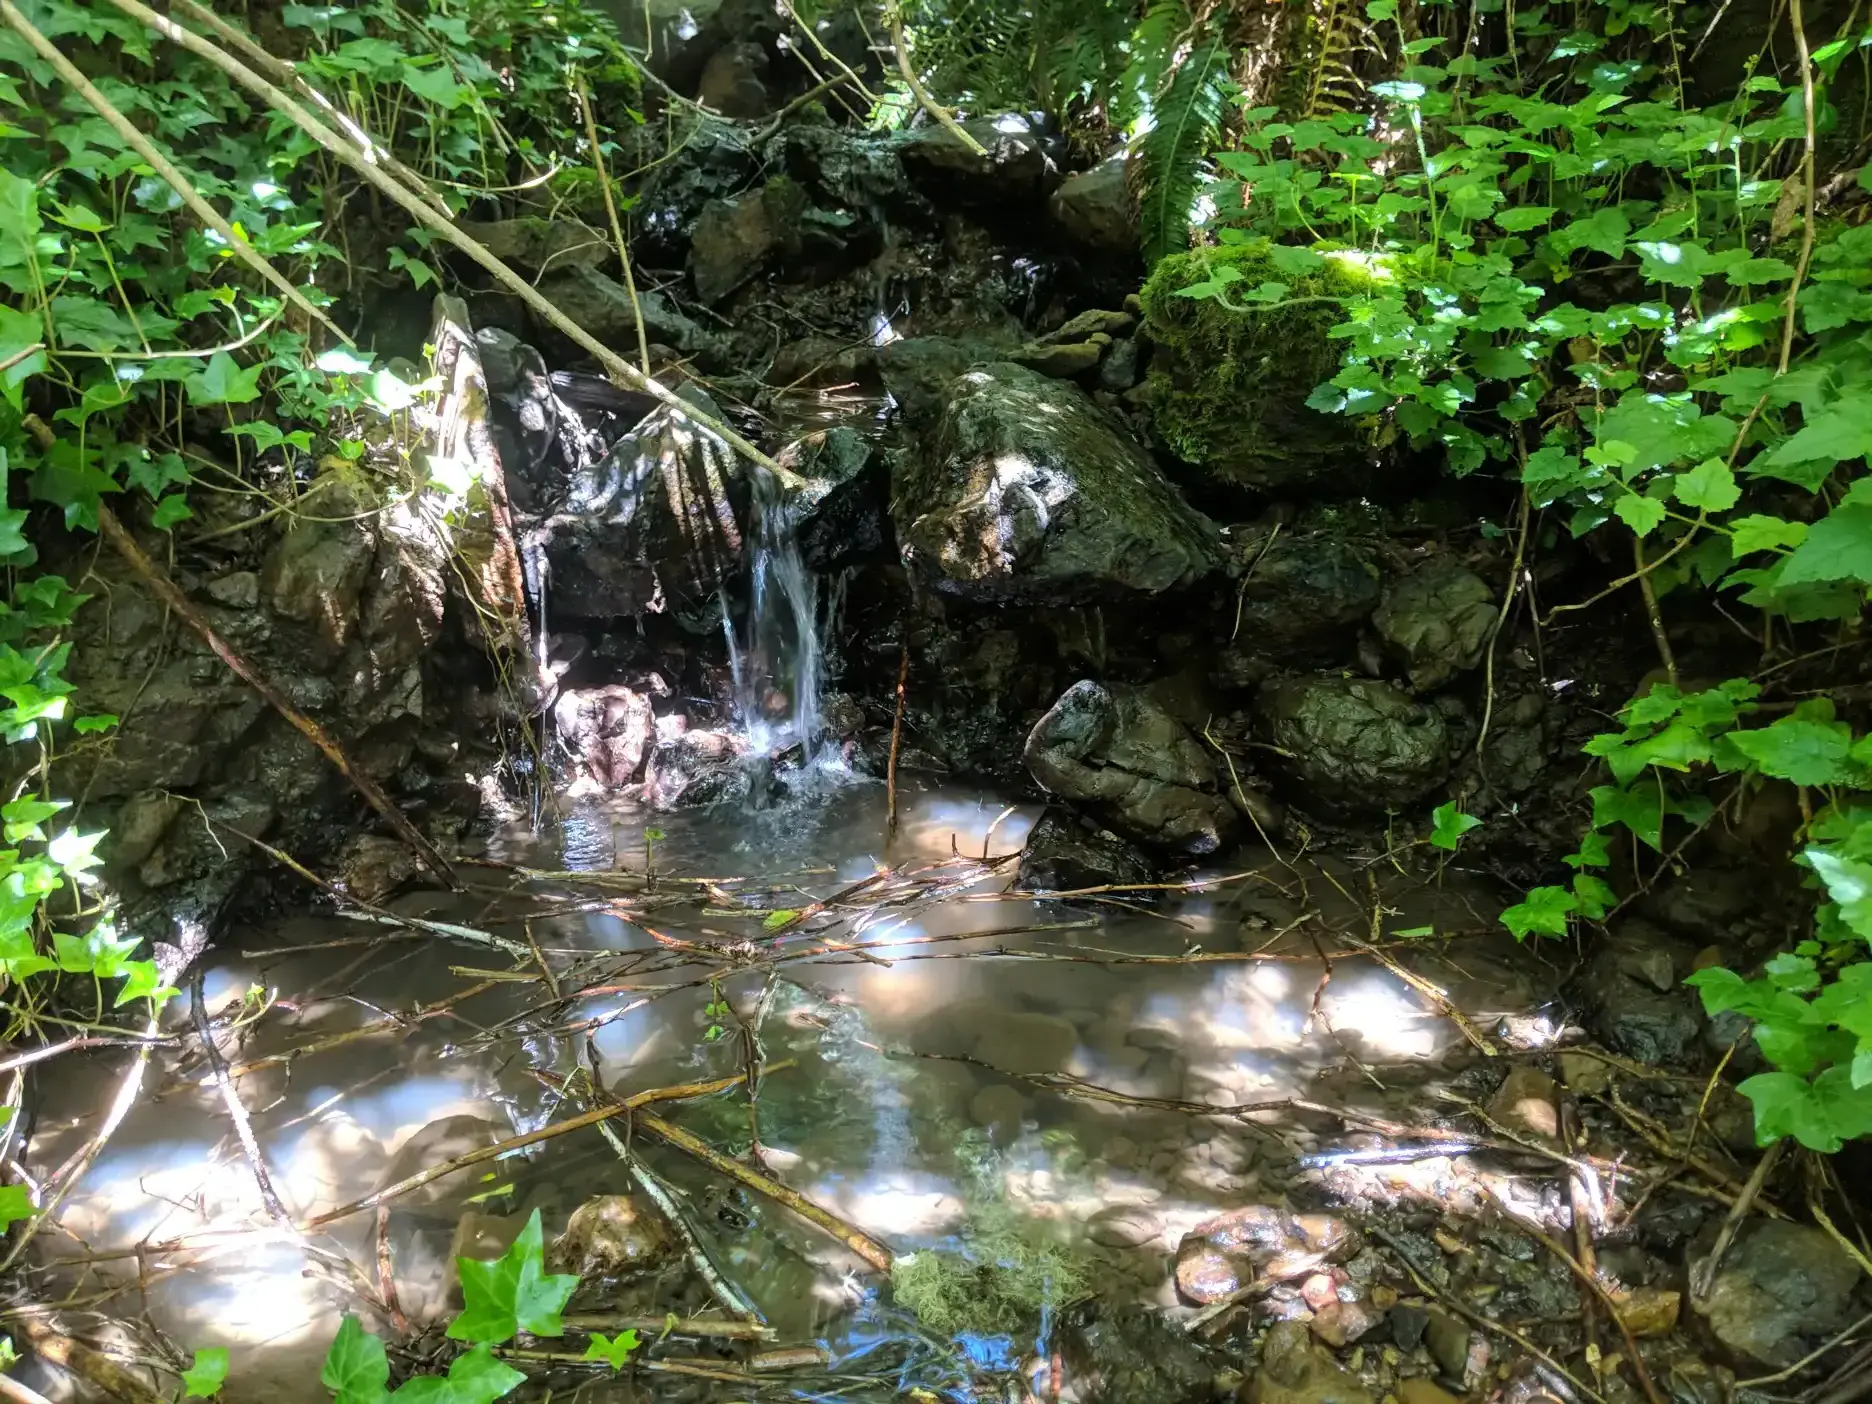
I don’t have snapshots of the spring water collector installation, so these are of the stream water installation instead. The process was identical.
Above is the site for the new collector before development.
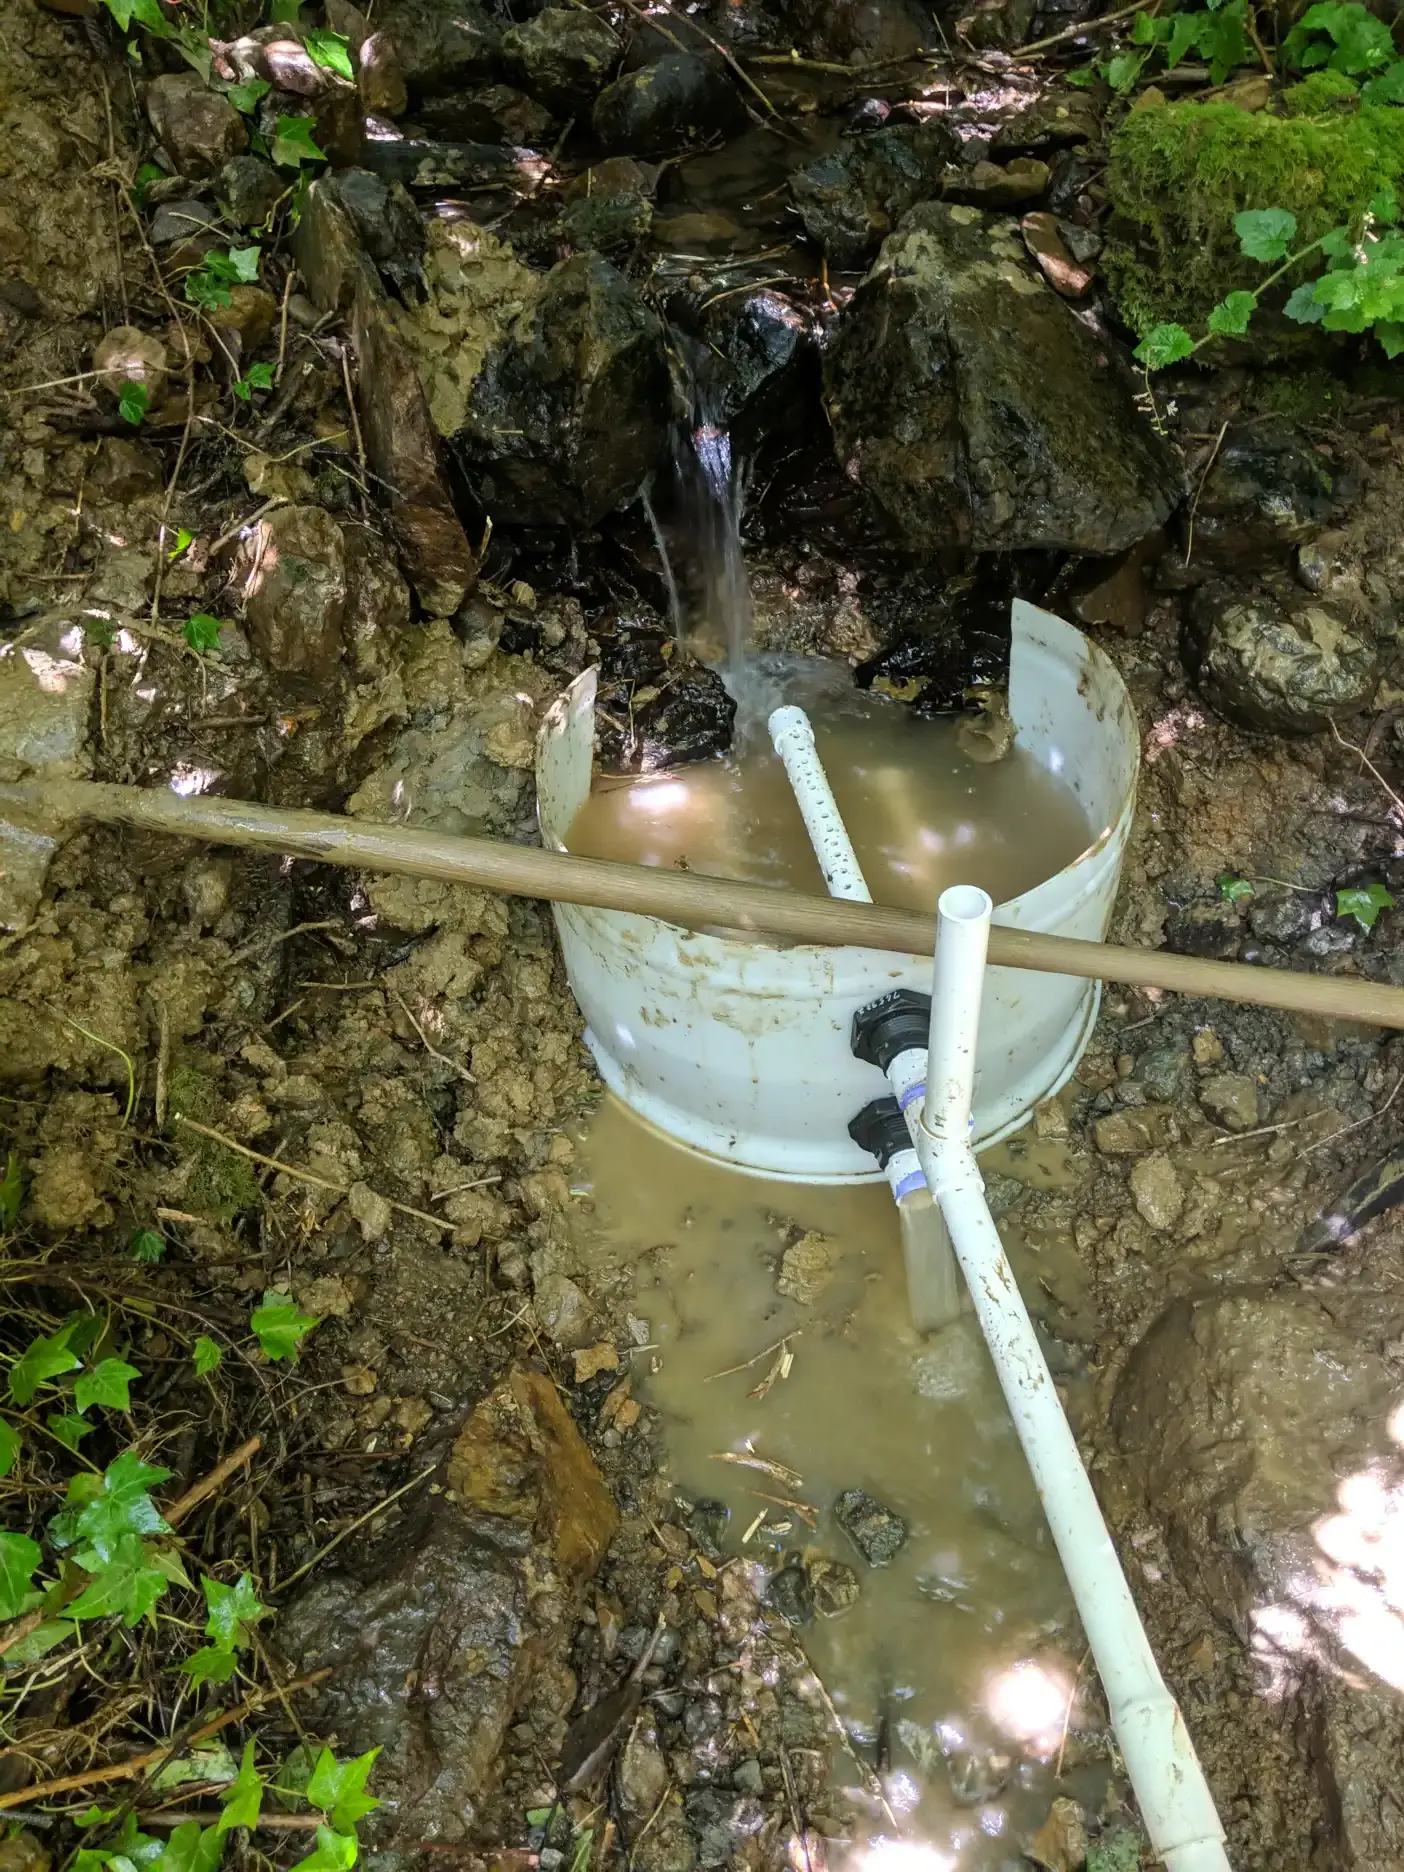
Checking the fit of the collector during excavation.
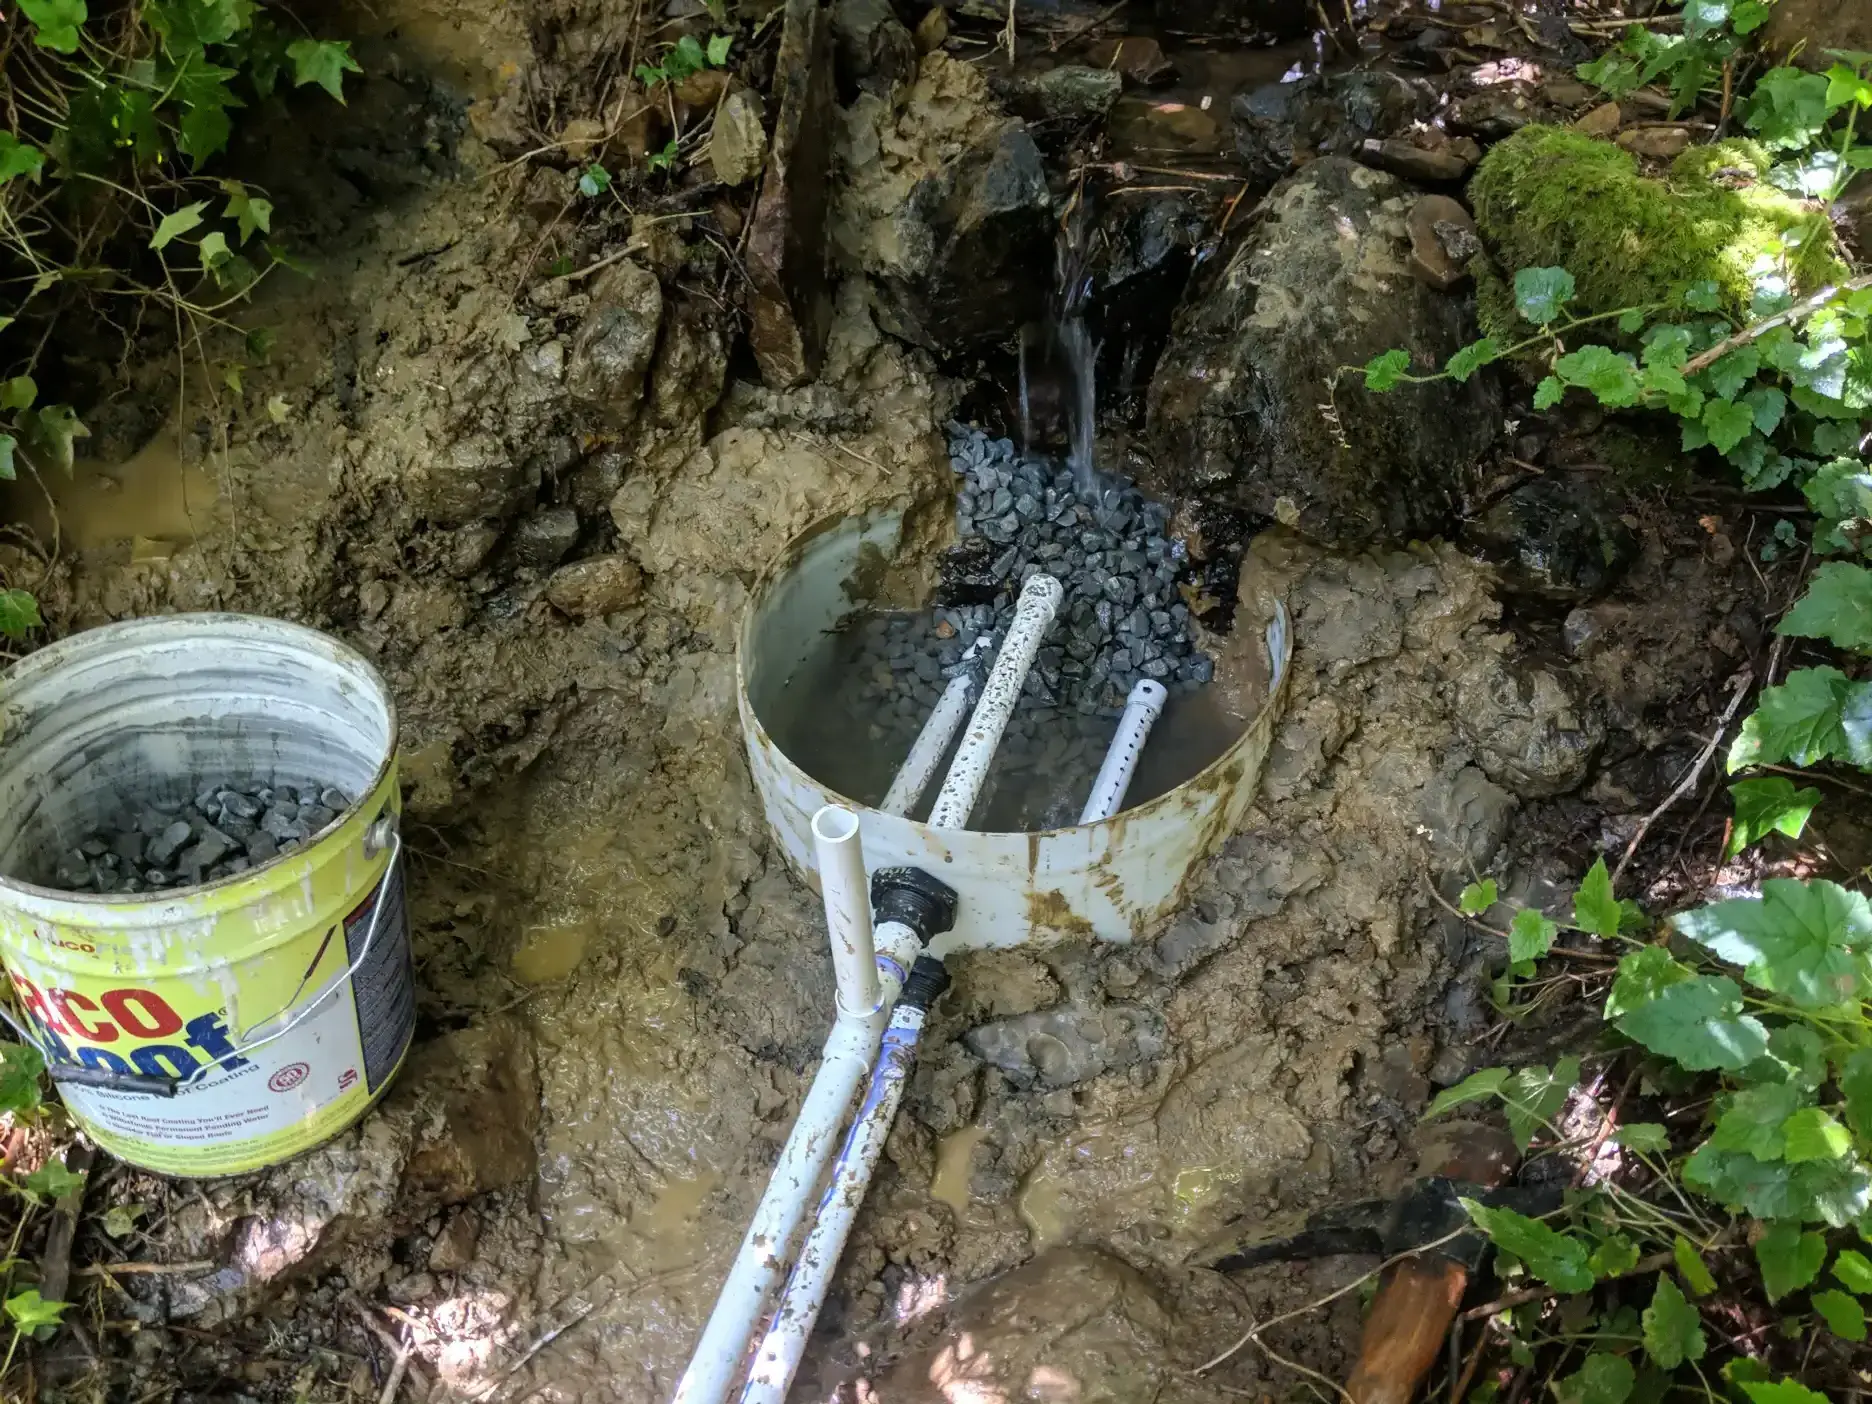
The installation now sealed with clay and partially filled with gravel.
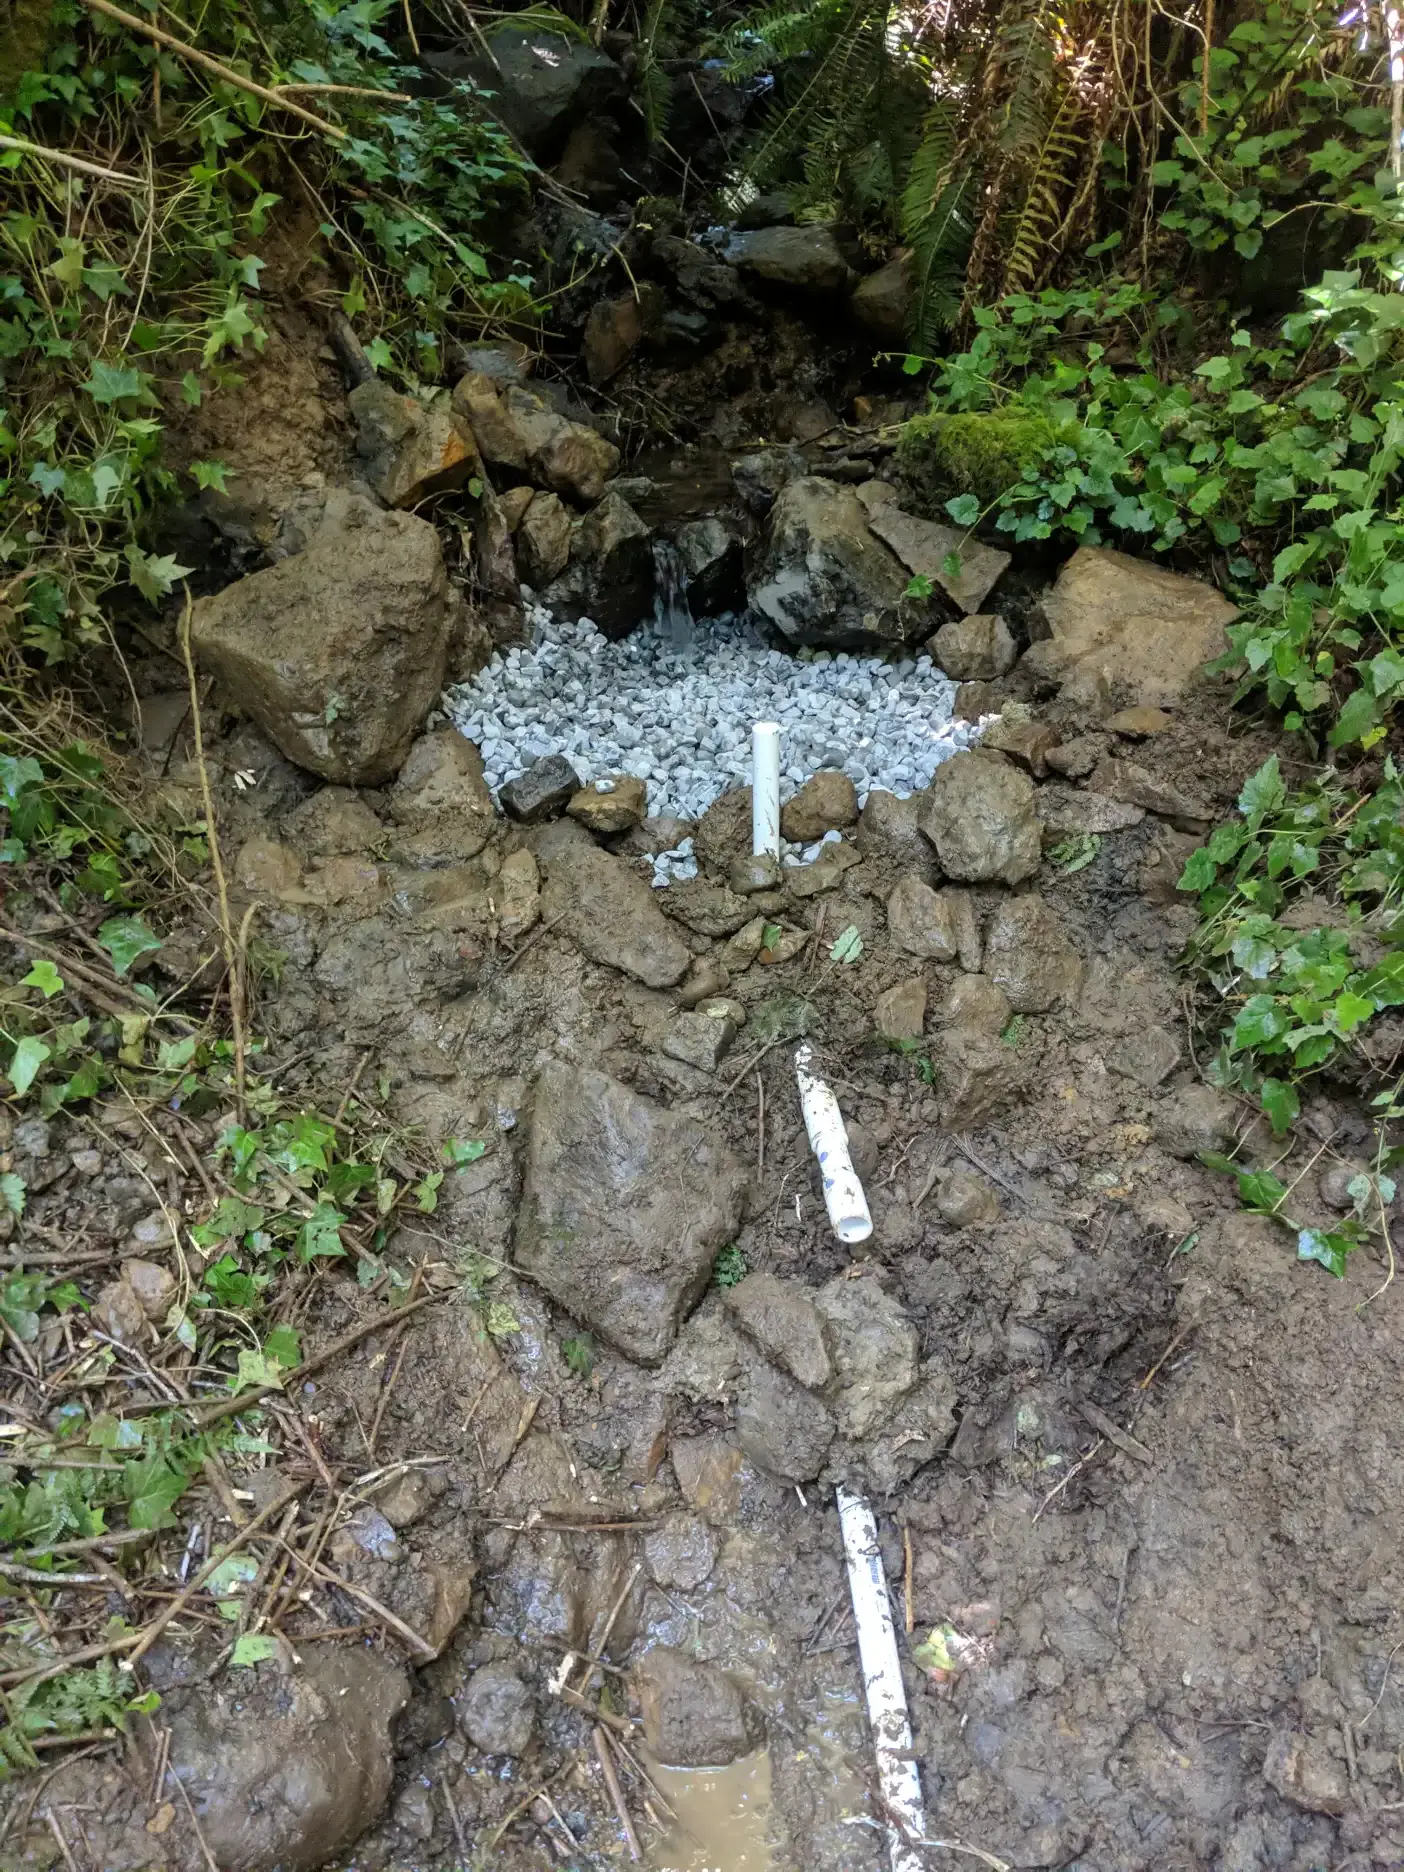
The completed stream collector now back-filled with clean gravel. The top tube is for overflow.
The Stream Box
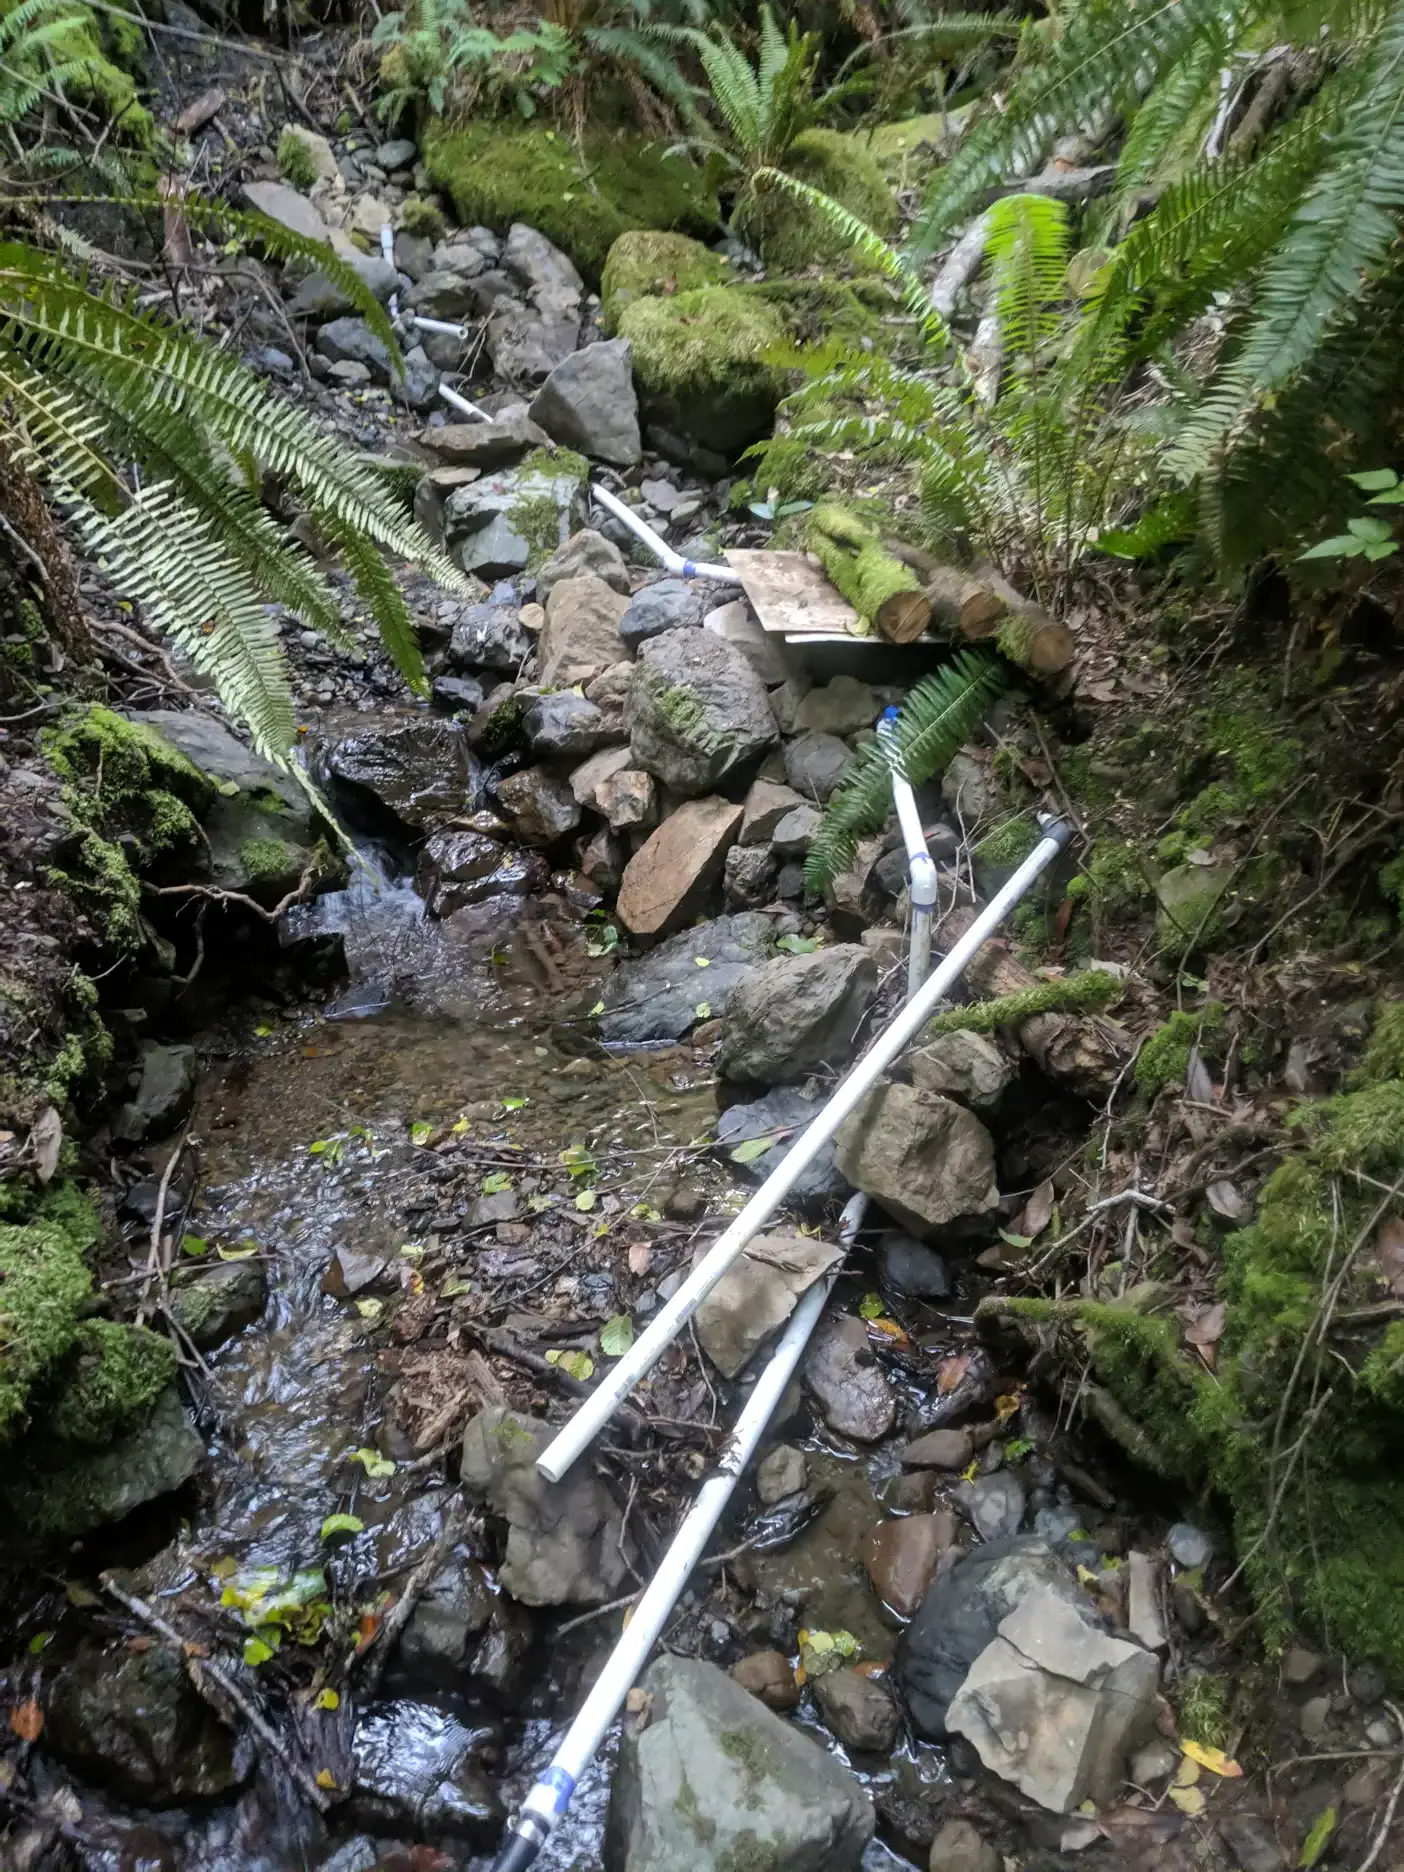
Now back at the spring installation, here is the spring with its collector, along with the spring box. The spring box also has an inlet, plus exit fittings, and an overflow/sediment clean out.
As mentioned, a spring box may not be strictly necessary in this sort of system, but it does help to separate out some of the sediment that would otherwise enter further into the installation. Cleaning sediment out of the spring box is much easier than it would be to clean the storage tank, or to unclog valves.
The pipe between the spring and the spring box crosses a creek, which is not ideal. There has been much moving of rock both last year and this year to prevent washouts and direct flow. Now, it looks like all important components are both stable and well-protected.
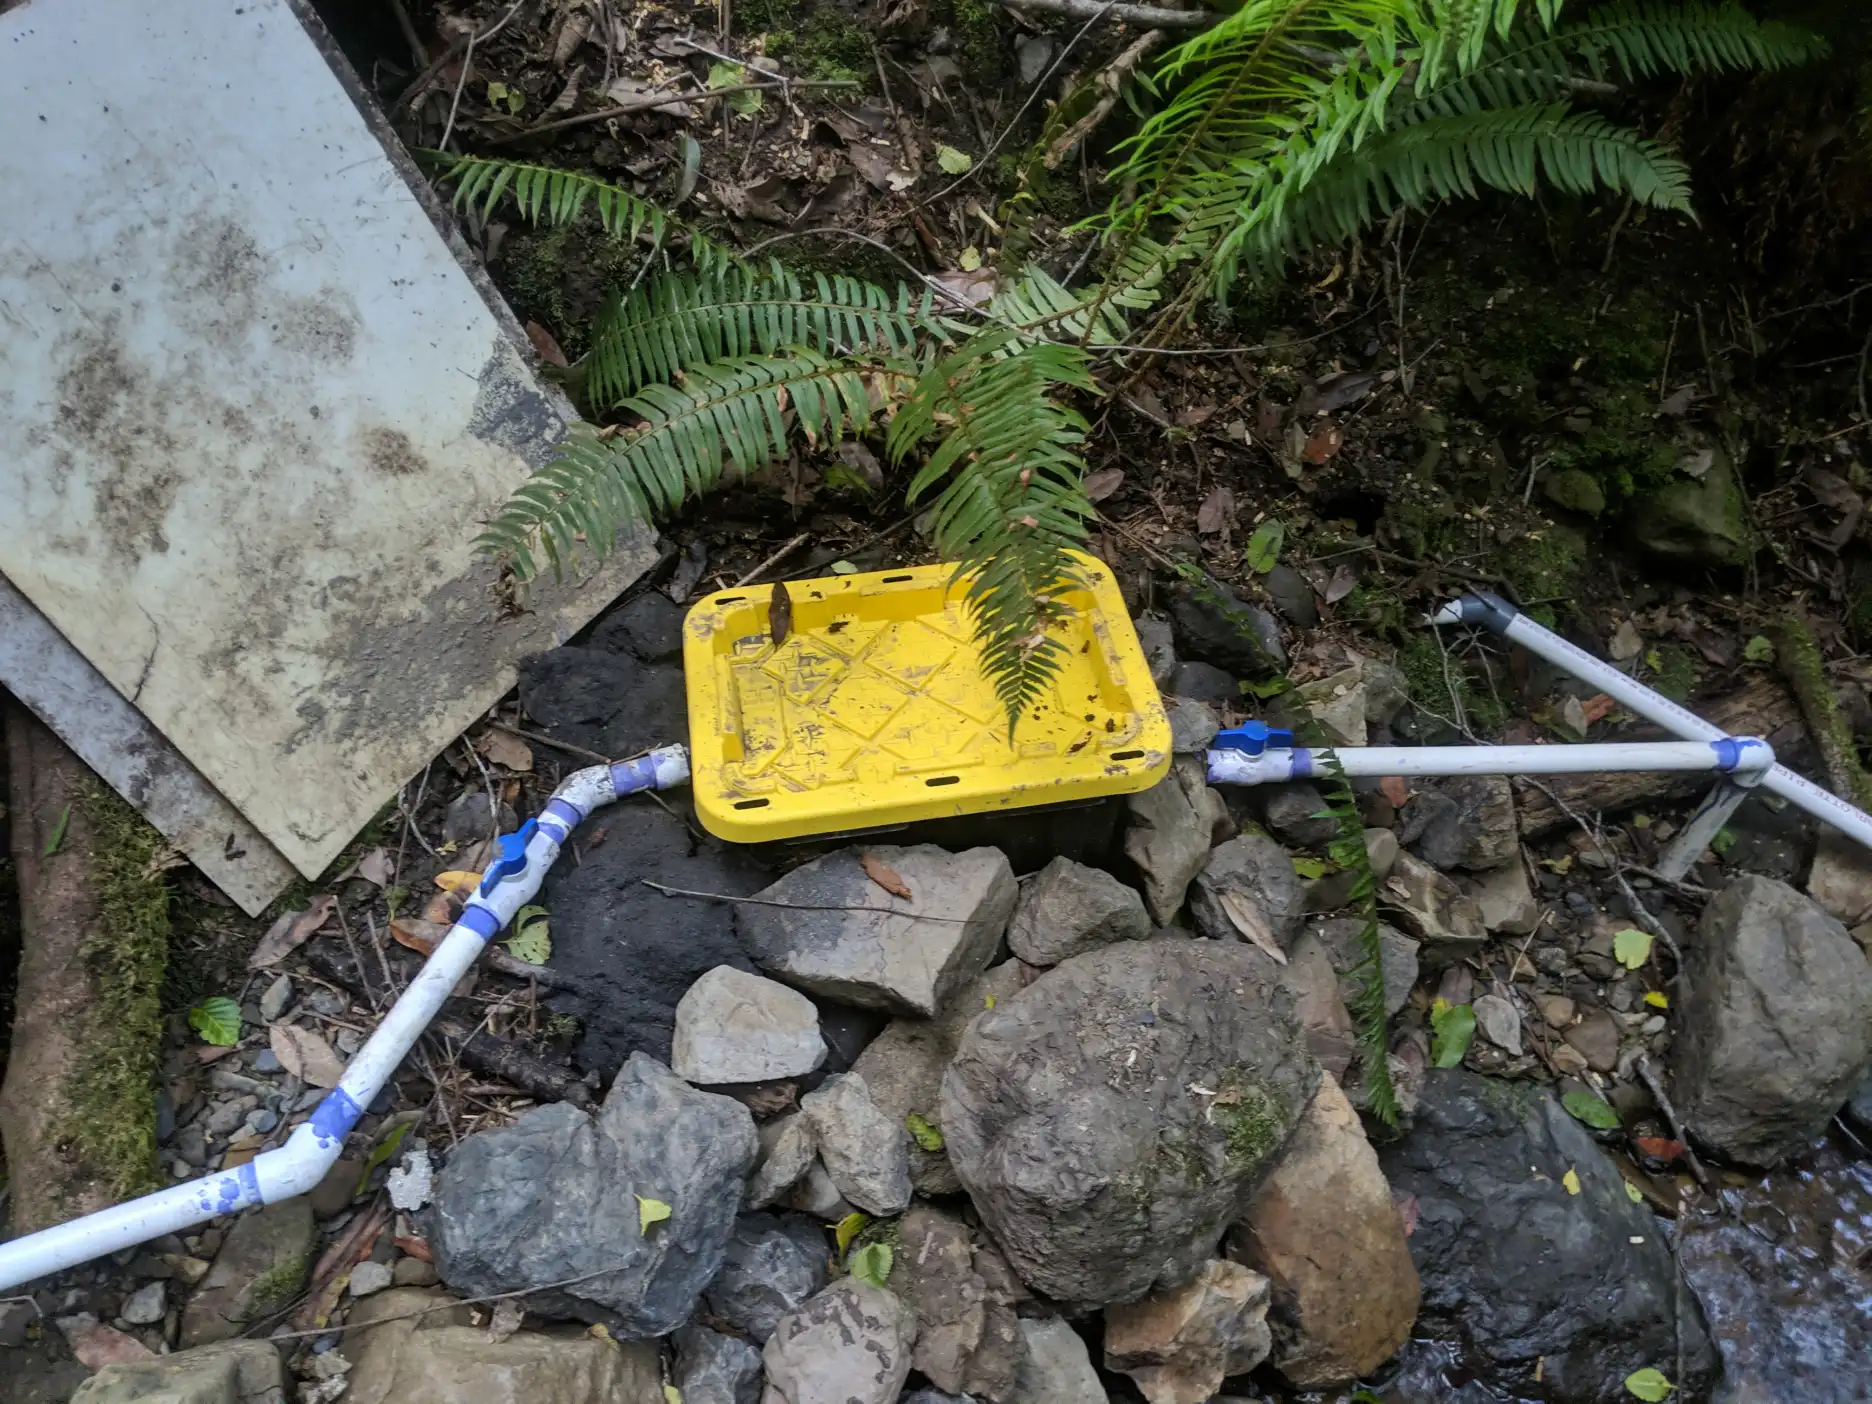
Here is the closed spring box. Normally, it is also covered with sheets of fiberglass weighted with debris. While this style of plastic storage bin is relatively robust, I don’t have much confidence in it lasting very long without protection from UV light penetration. If making a new spring box, I would use a deeper bin. Space in this one was a bit cramped when installing the components, and it doesn’t provide that much space for sediment.
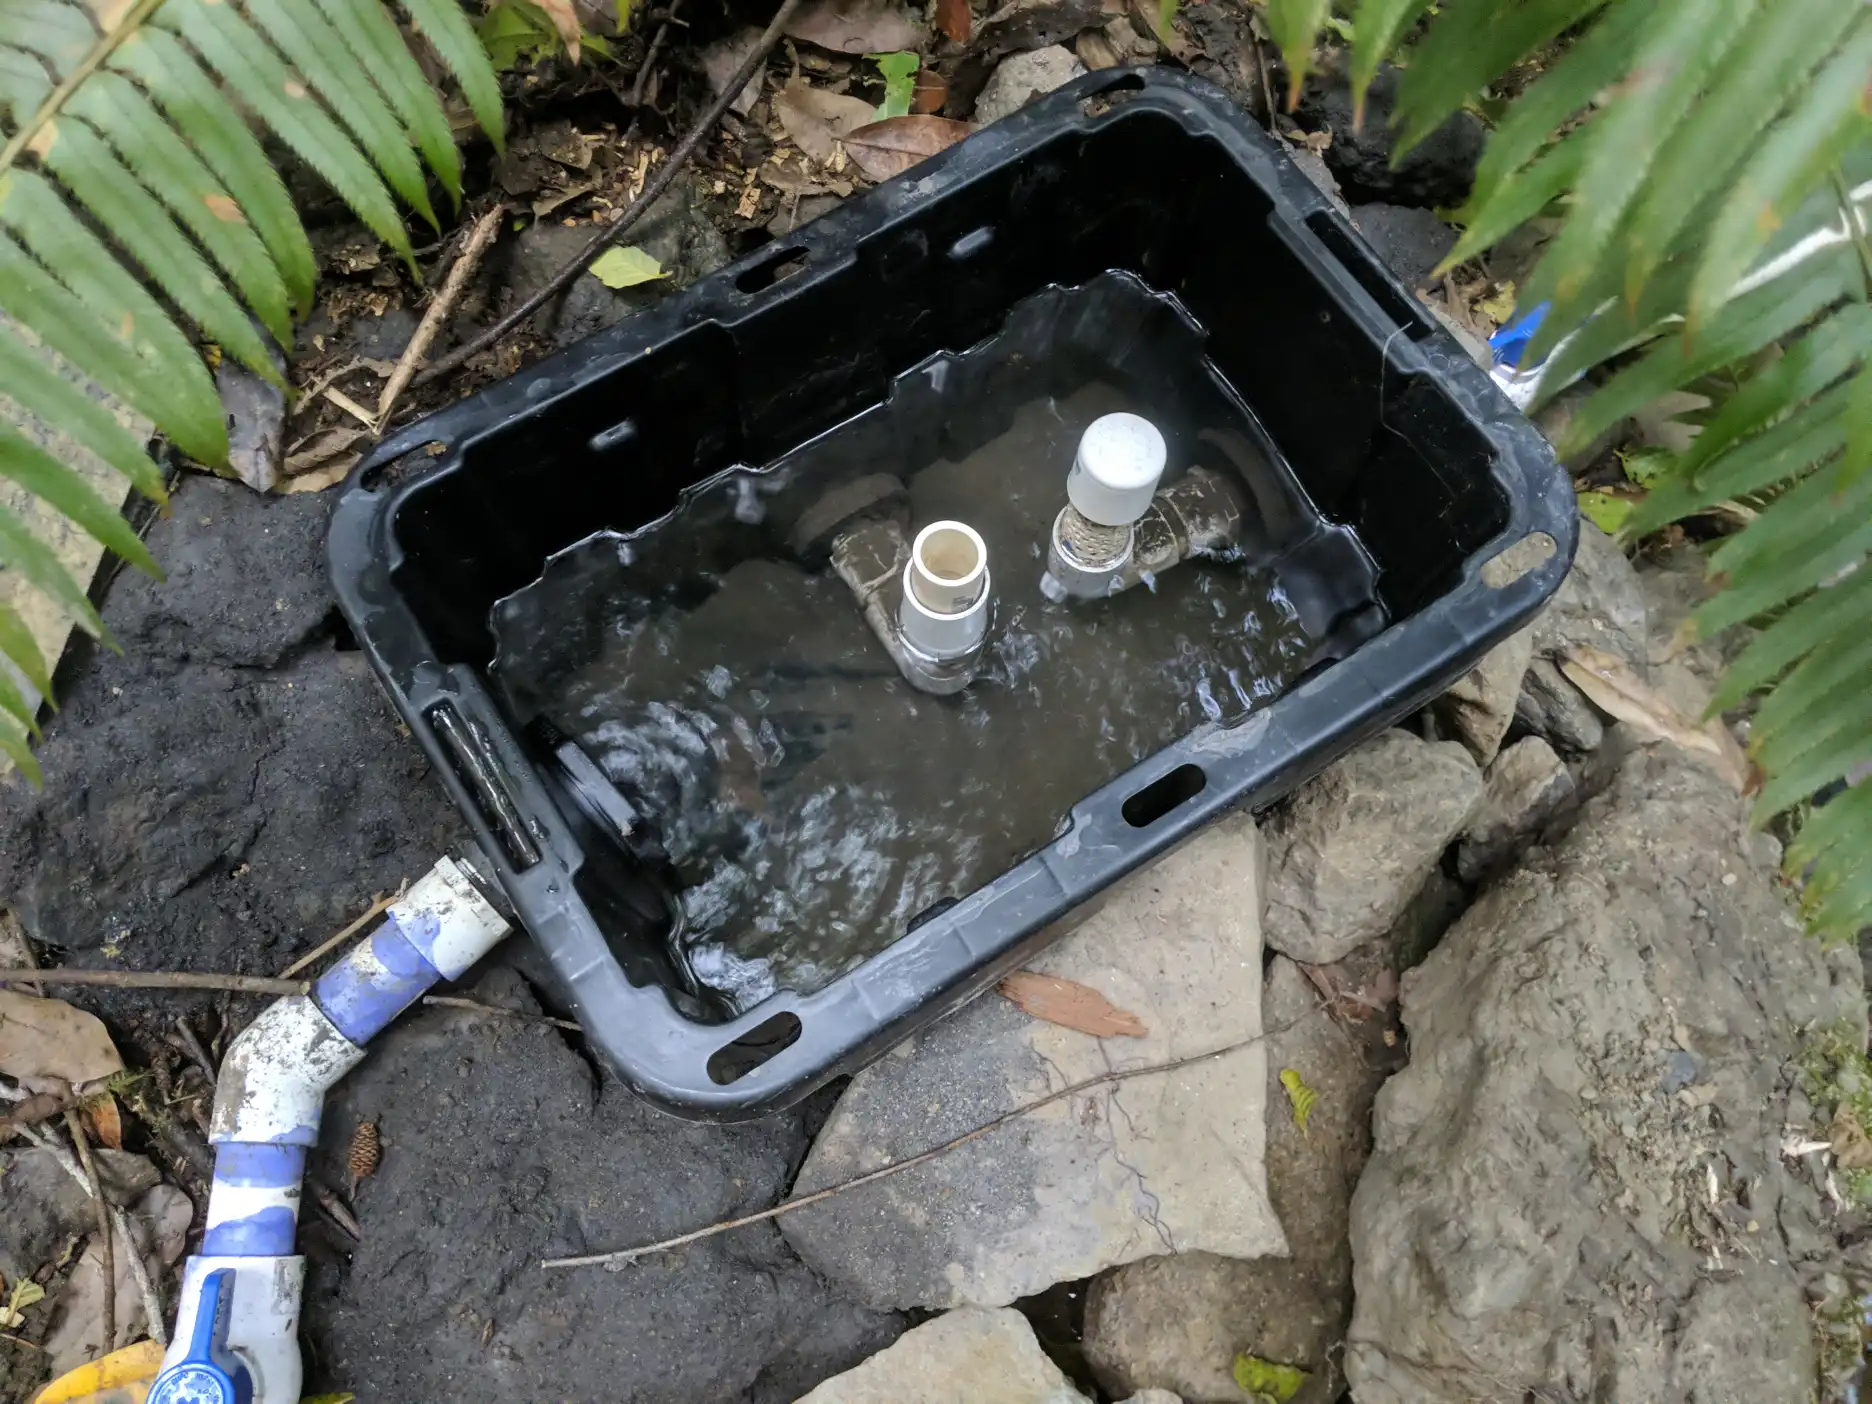
Inside the spring box, the water entry is on the left, the exit on the right, and overflow in the middle. The exit is a capped section of perforated pipe, installed without cement to facilitate easy cleaning if needed.
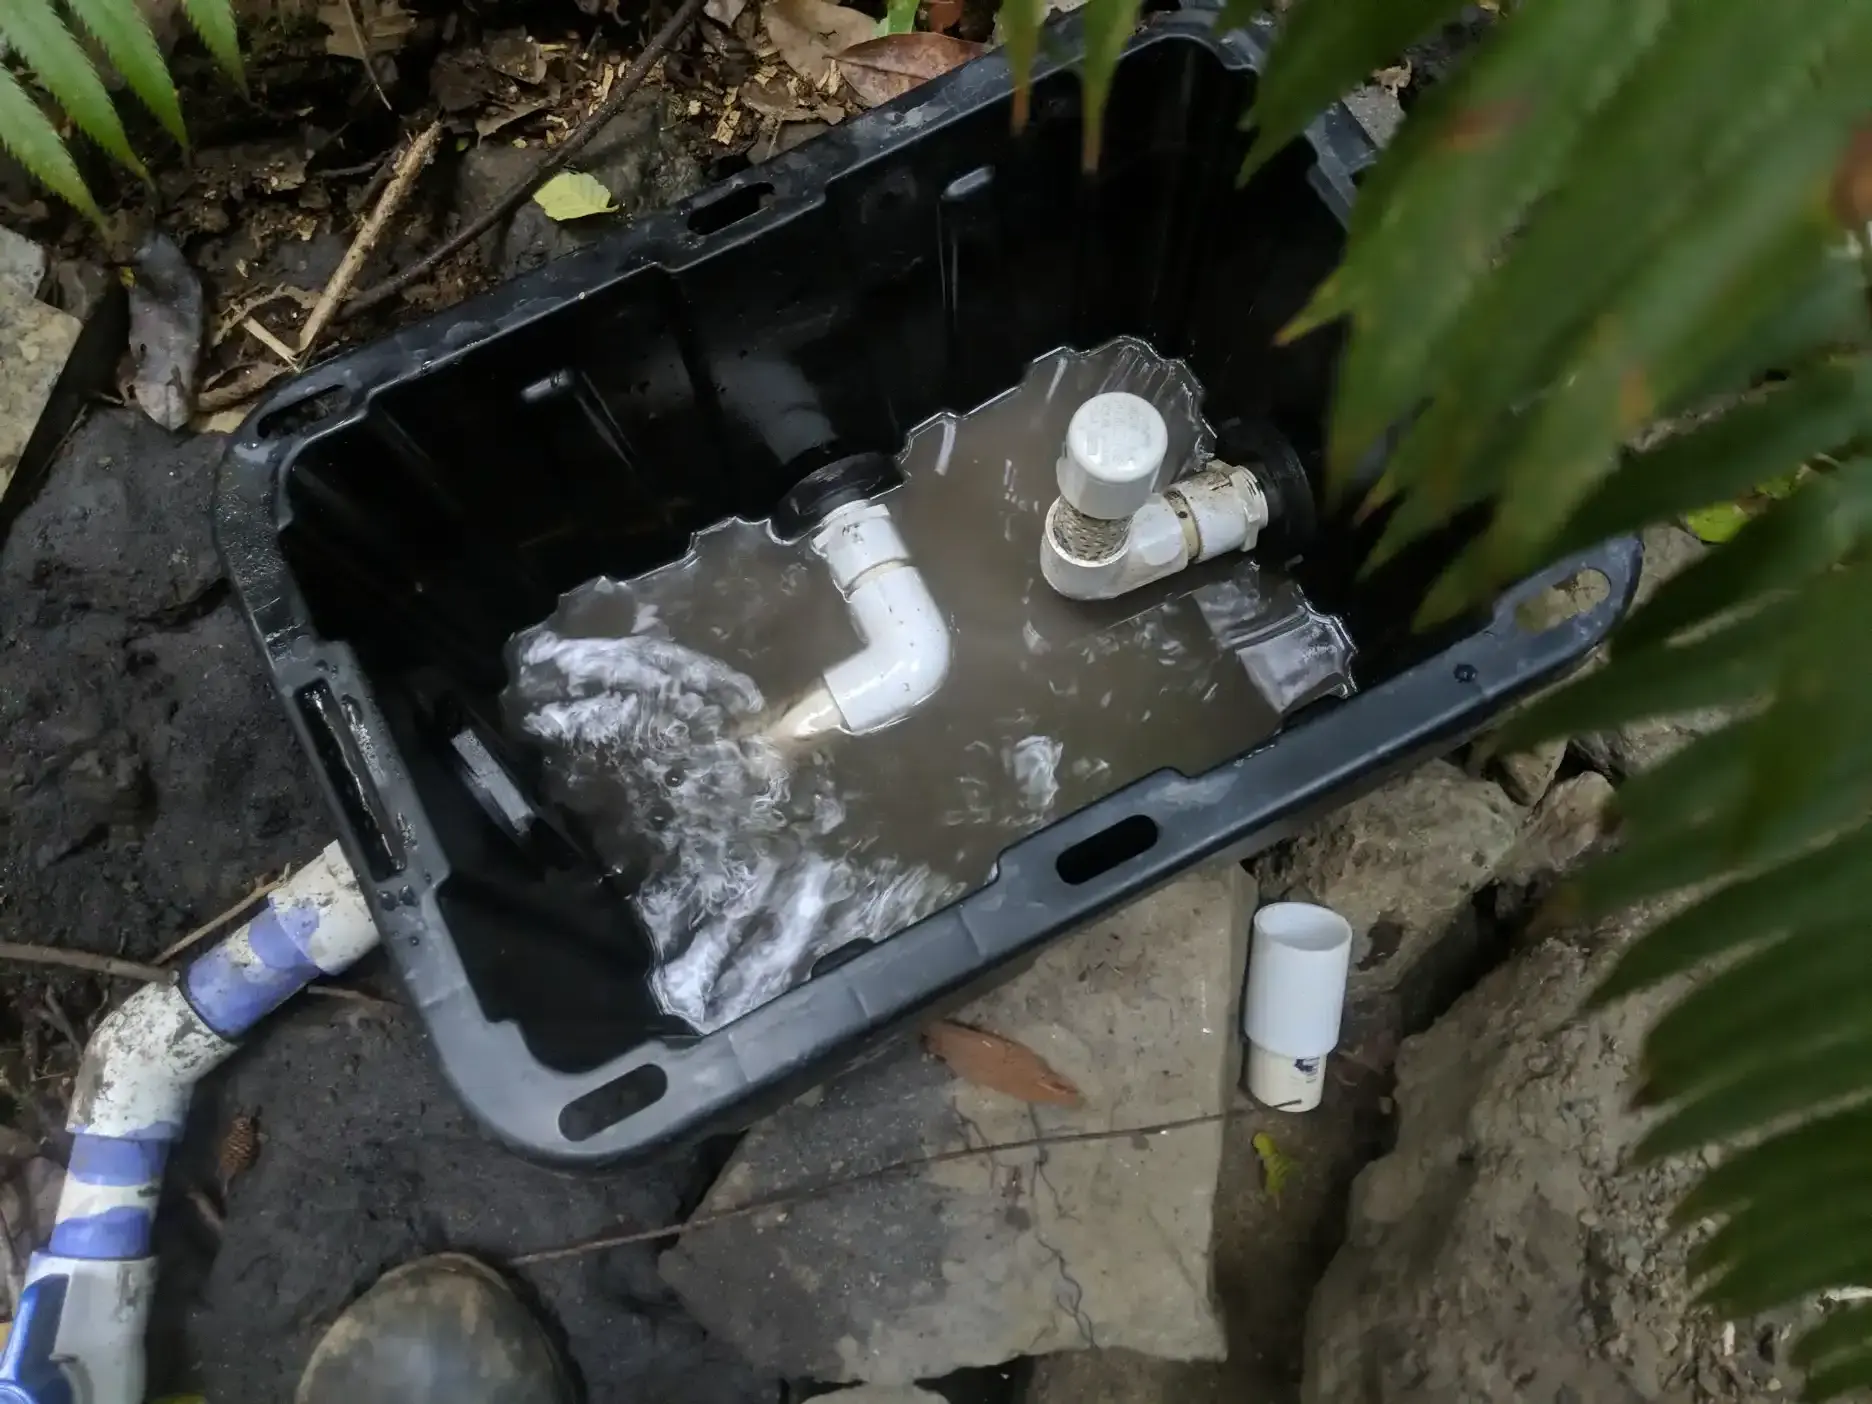
The overflow doubles as clean out when rotated. I find it most expedient to scoop out as much sediment as possible with whatever manual implement is on hand before rotating the clean out to the side to drain out more of the sediment-laden water.
Water Transport
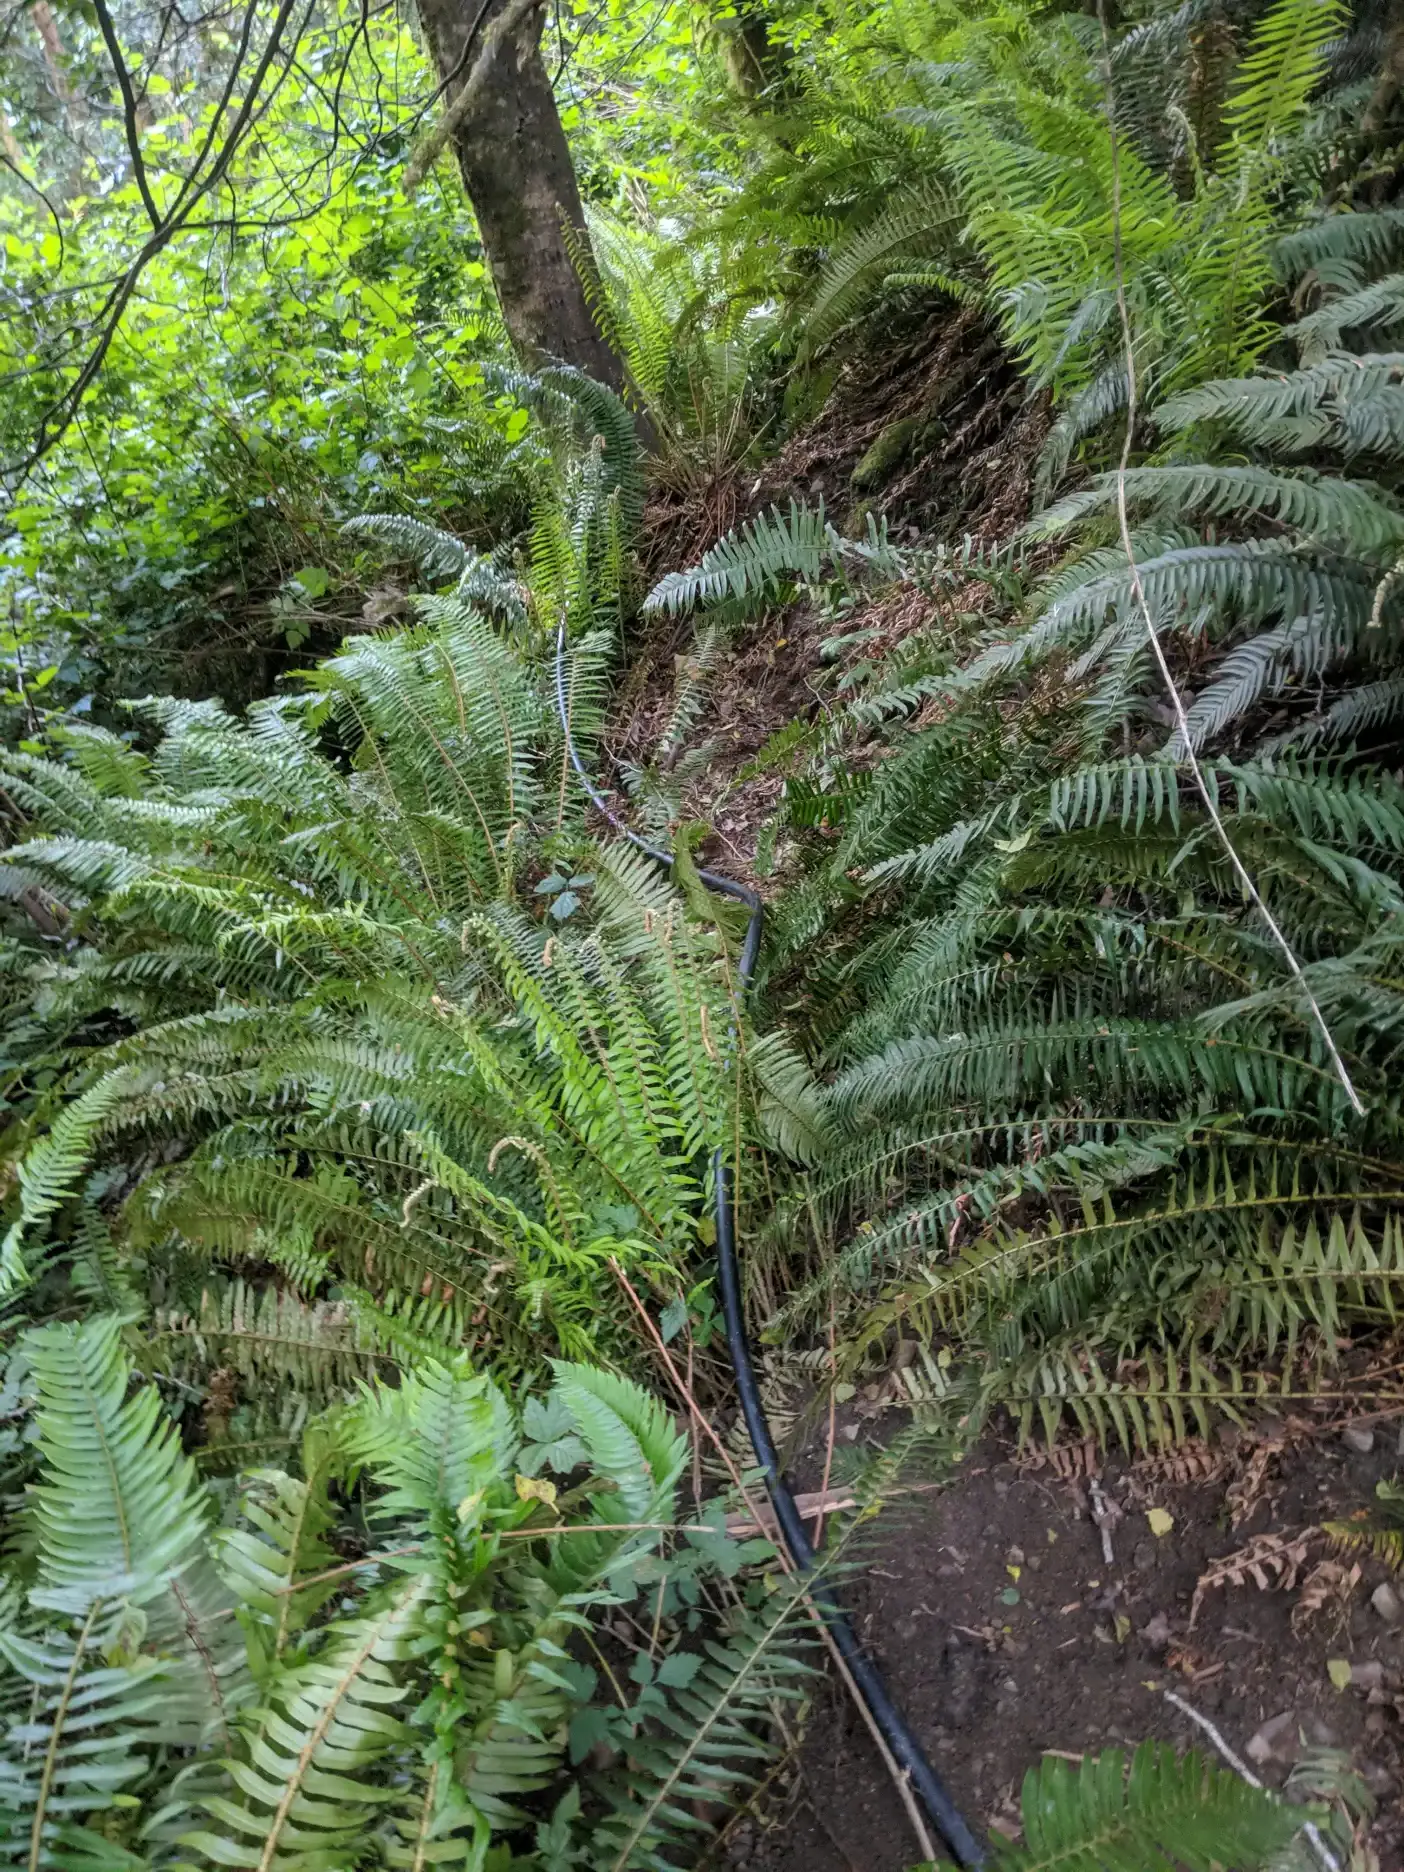
After the spring box follows a full 300’ roll of 1” poly pipe. Here is part of the tubing route.
In total, there are about 300’ of poly pipe connecting the spring box to the inline storage cistern, then another 300’ connecting the storage cistern to the house. Despite friction from all that pipe, flow rate at the house/shed is is considerable. I measured about 10GPM.
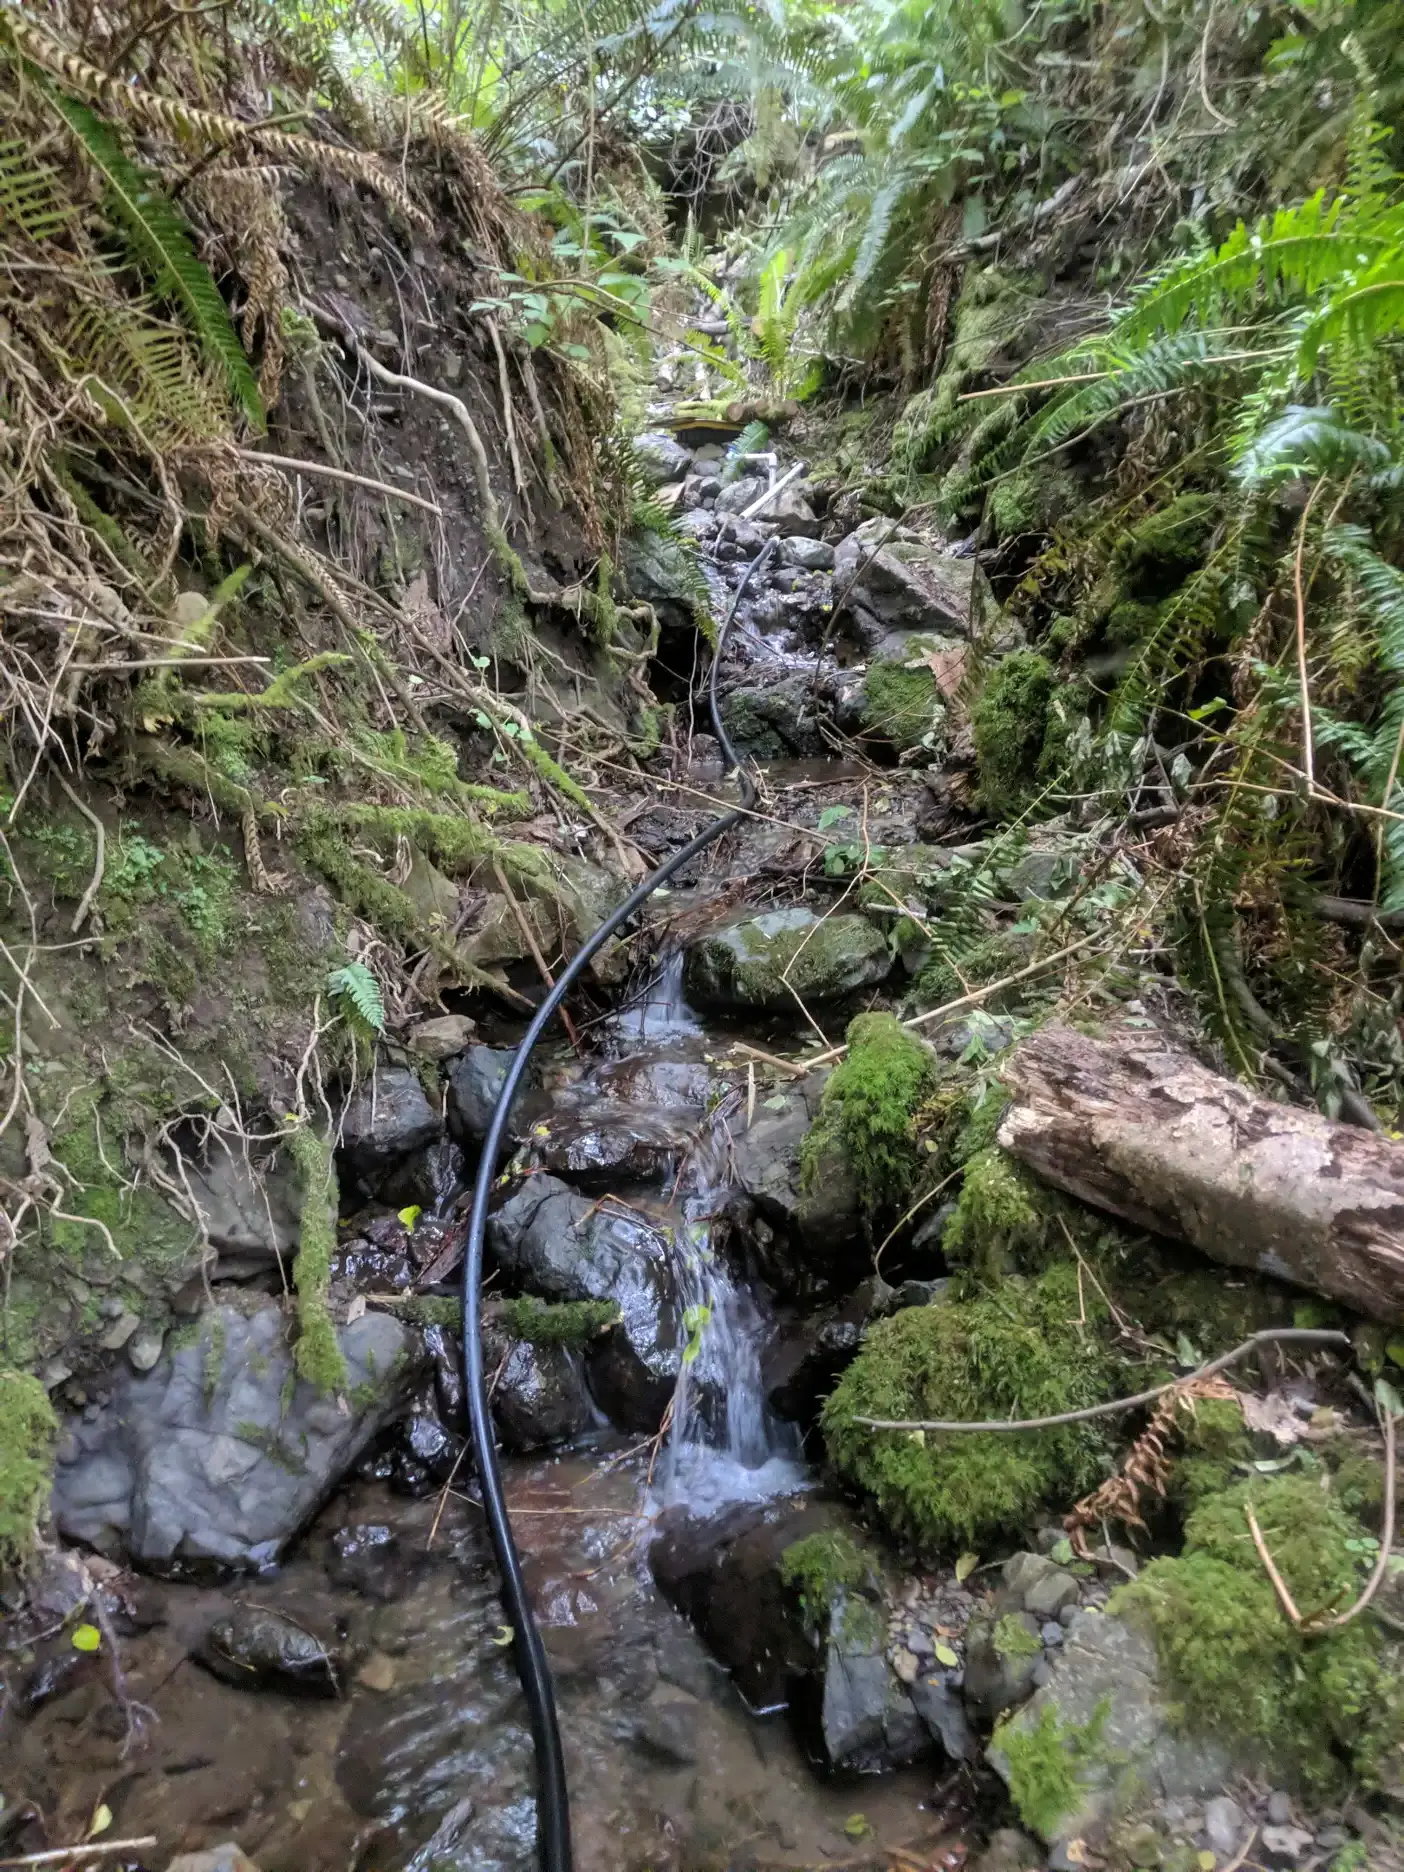
The tubing where it exits the spring box. This is the only section that is in the creek bed.
Initially, I un-spooled a full 100m roll of tubing down the creek, but had to reroute a few times to find a workable path to the cistern site. Even though the cistern is located at an elevation of at least a couple meters lower than the spring box, the terrain between the two installations is irregular.
Ideally the tubing would follow a constant >2% slope over its length. Failing that, it must never rise higher than the spring box at any point. Finding that meant a very sweaty day of pulling the tubing through blackberries plus hand excavation of unruly topographical features.
Long sections of poly pipe and other kinds of spooled tubing can be difficult to un-spool and maneuver without it kinking. The process that works best for me is to un-spool it by rolling it along the ground as if it were a larger tire. A helper should hold the loose end through this process, or it can be secured with a large rock or other inanimate object. Once the entire length is unrolled, preferably more or less in a straight line and in the sun, it needs to be maintained straight and under some tension while threading it through the woods. That means that one person acts as the tubing guide, at the front of the section of tubing, and a helper maintains tension at the other end to keep it from kinking. It is possible to work without a helper, but far more difficult to do so without any kinks in the line (which usually need to be cut and spliced).
In-line Water Storage
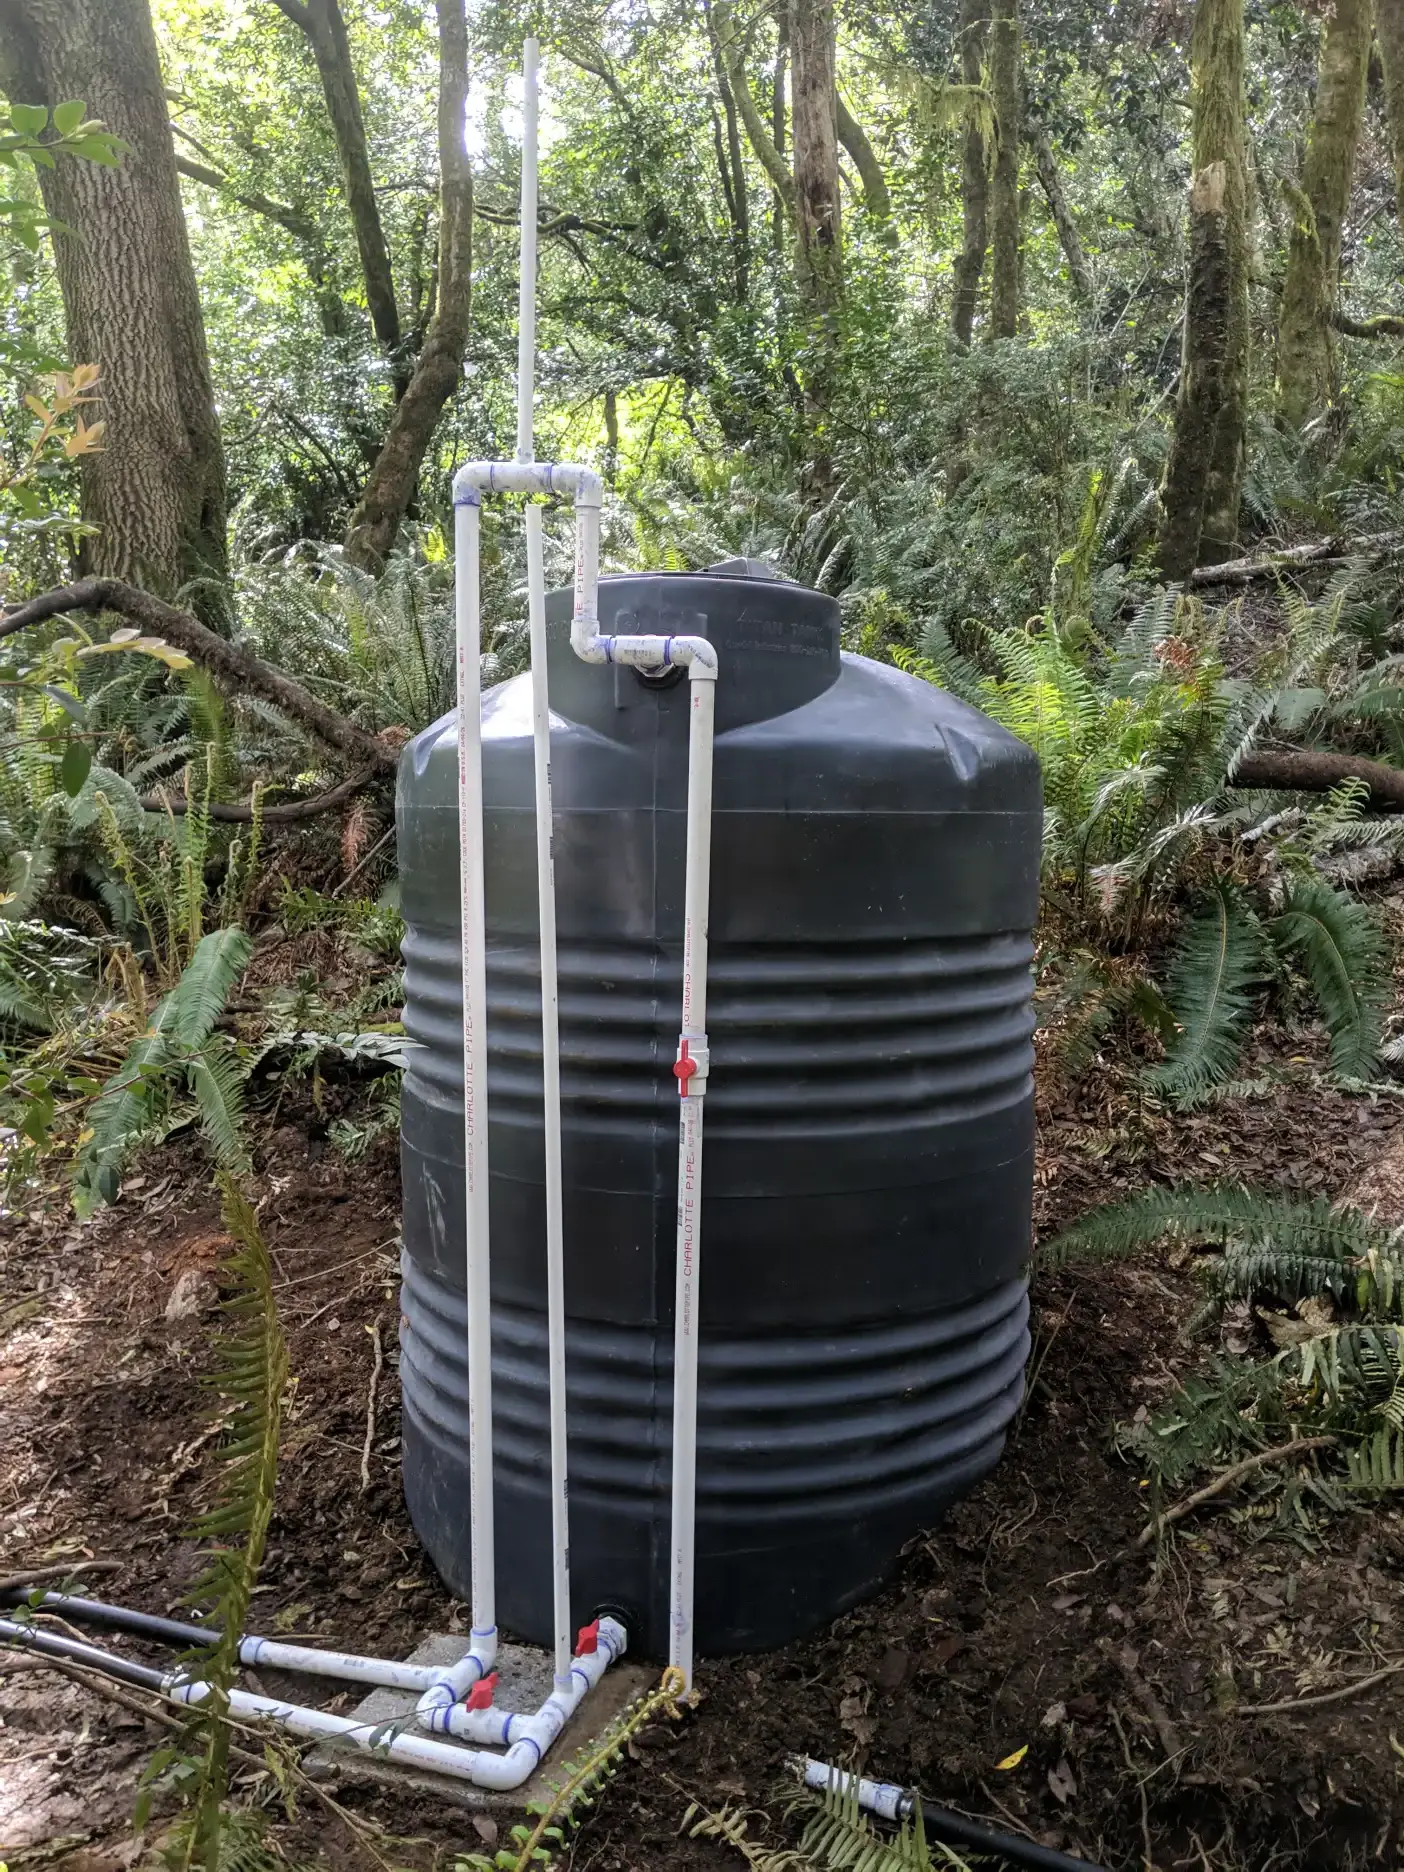
This is the in-line storage cistern for the gravity-fed spring water system. Like a spring box, a storage vessel is not strictly necessary in a spring water system (or in a stream water system). Such a tank does help to normalize water pressure and maintain consistent flow. This system can experience periods of low incoming water flow, however with this 500 gallon storage cistern in place, normal household use should be easily accommodated.
The manifold may look strange. Here are the design considerations that led to its form:
- Maintain continuous water flow from the spring to the cistern. This should help keep things from silting up in times of low water demand, and also ensure that the involved section of the system cannot freeze.
- Avoid tank perforations. Other water system designs involve overflow entering the cistern then leaving through a different perforation. I wanted to avoid additional tank perforations, and also avoid the additional sediment load that sort of design could implicate.
- Including an anti-siphon mechanism in the design. I’m not certain that the overflow could develop a siphon that would prevent or reduce in-flow to the cistern, but was keen to avoid it anyway.
- Avoid erosion. The tank is positioned high up a steep grade. Plumbing the overflow to empty into a nearby creek rather than in the vicinity of the tank should reduce the possibility of erosion.
In short, the above manifold is the best way I could think of to implement continuous flow for the supply line without excess water entering and leaving the cistern.
The two vertical sections of half-inch pipe are an anti-siphon vent for the overflow and a breather tube for the tank exit. The inlet overflow and drain then share a single poly pipe that empties into a creek.
One change I would make to the design if installing again would be to terminate the drain assembly with another inline ball valve as a direct clean out. I find that designing in redundant clean out and shutoff points in this sort of system can make maintenance much more agile.
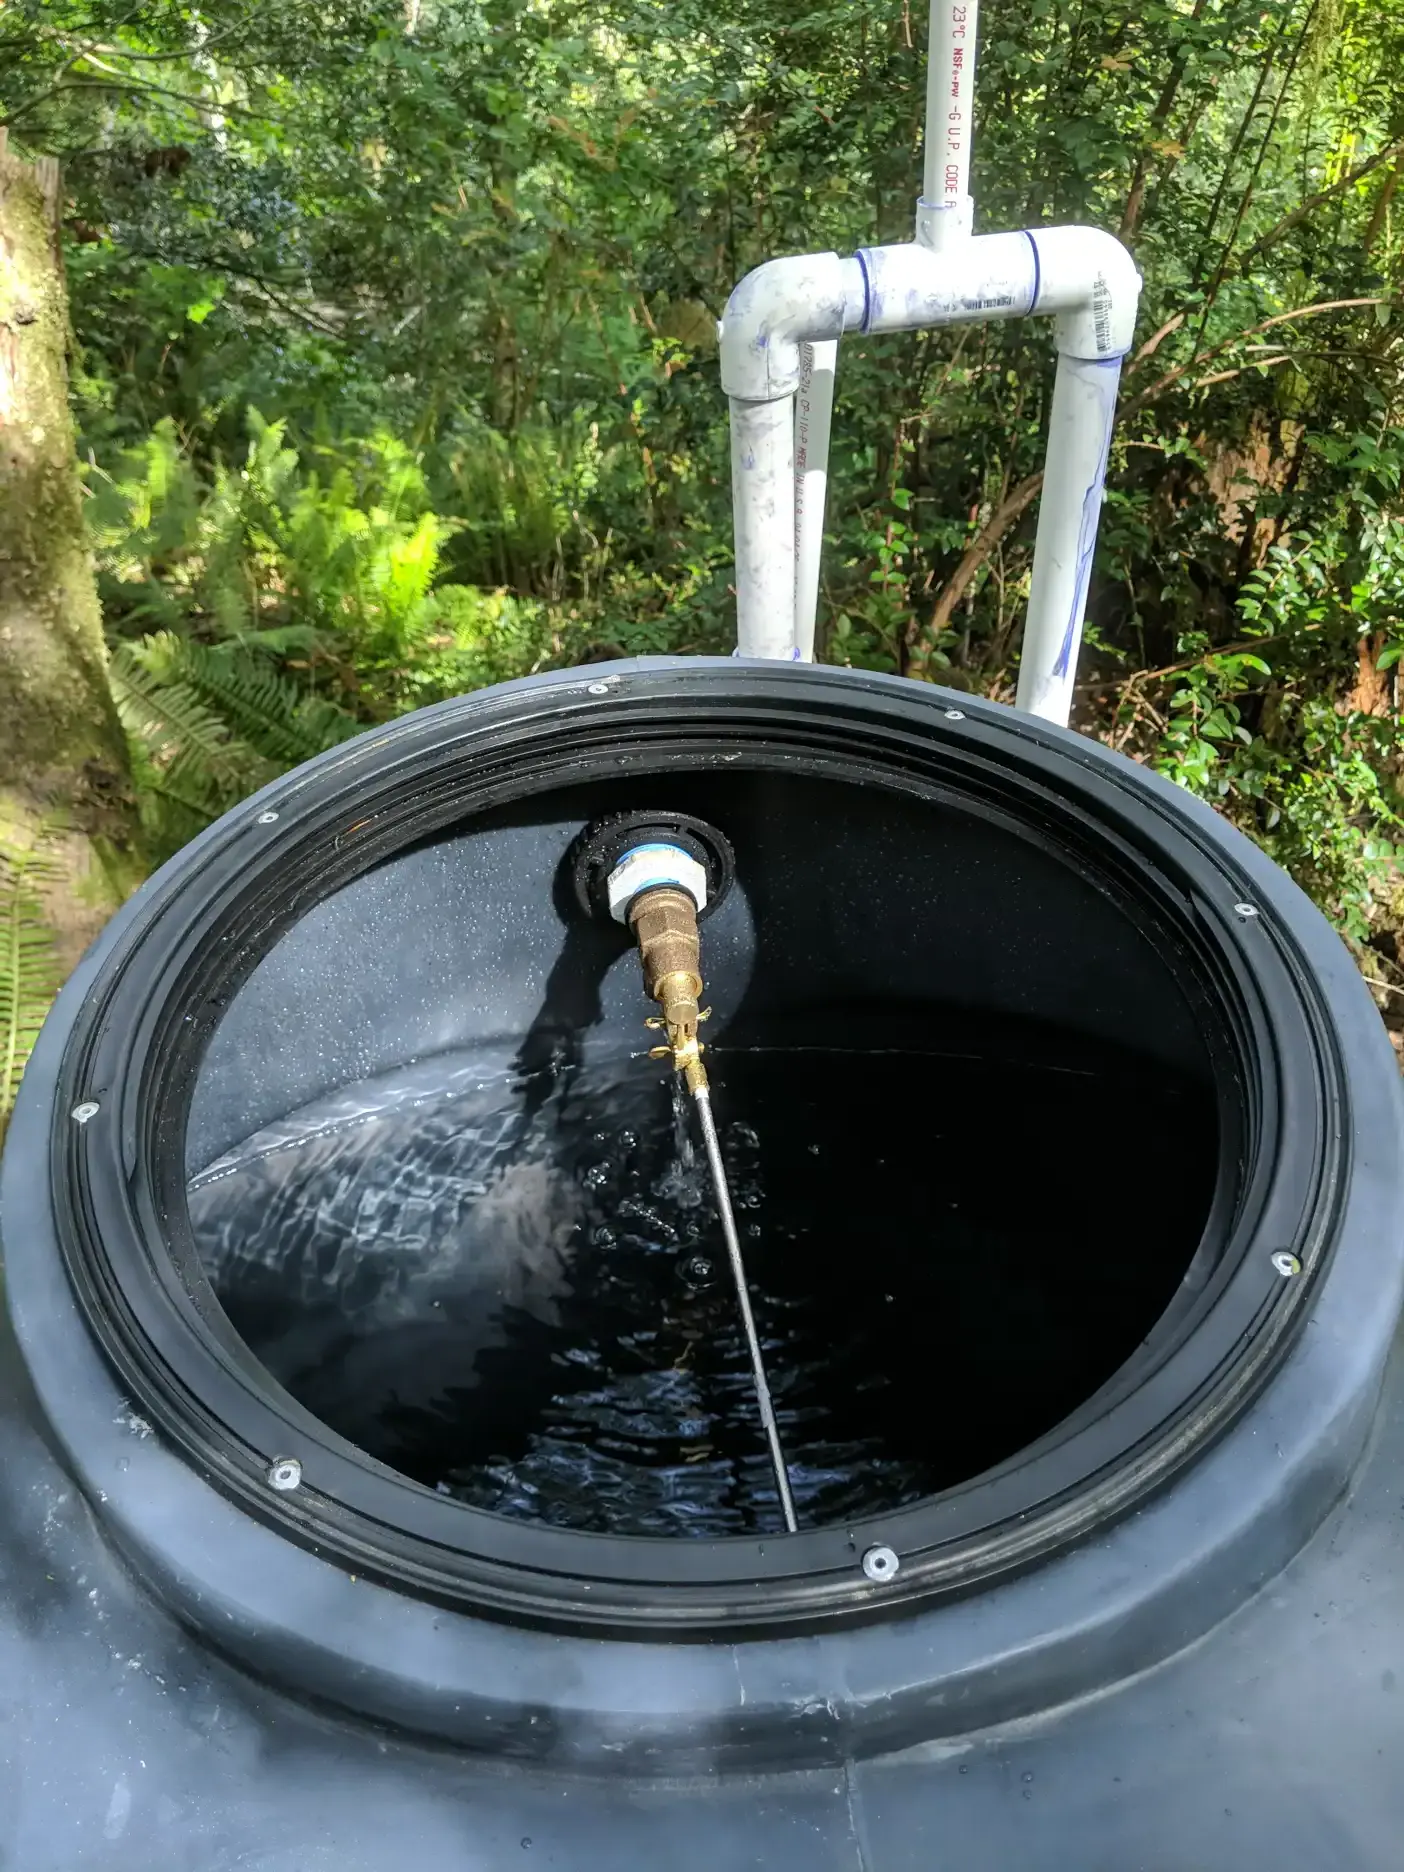
Inside the cistern, a simple float valve regulates fill.
System Termination
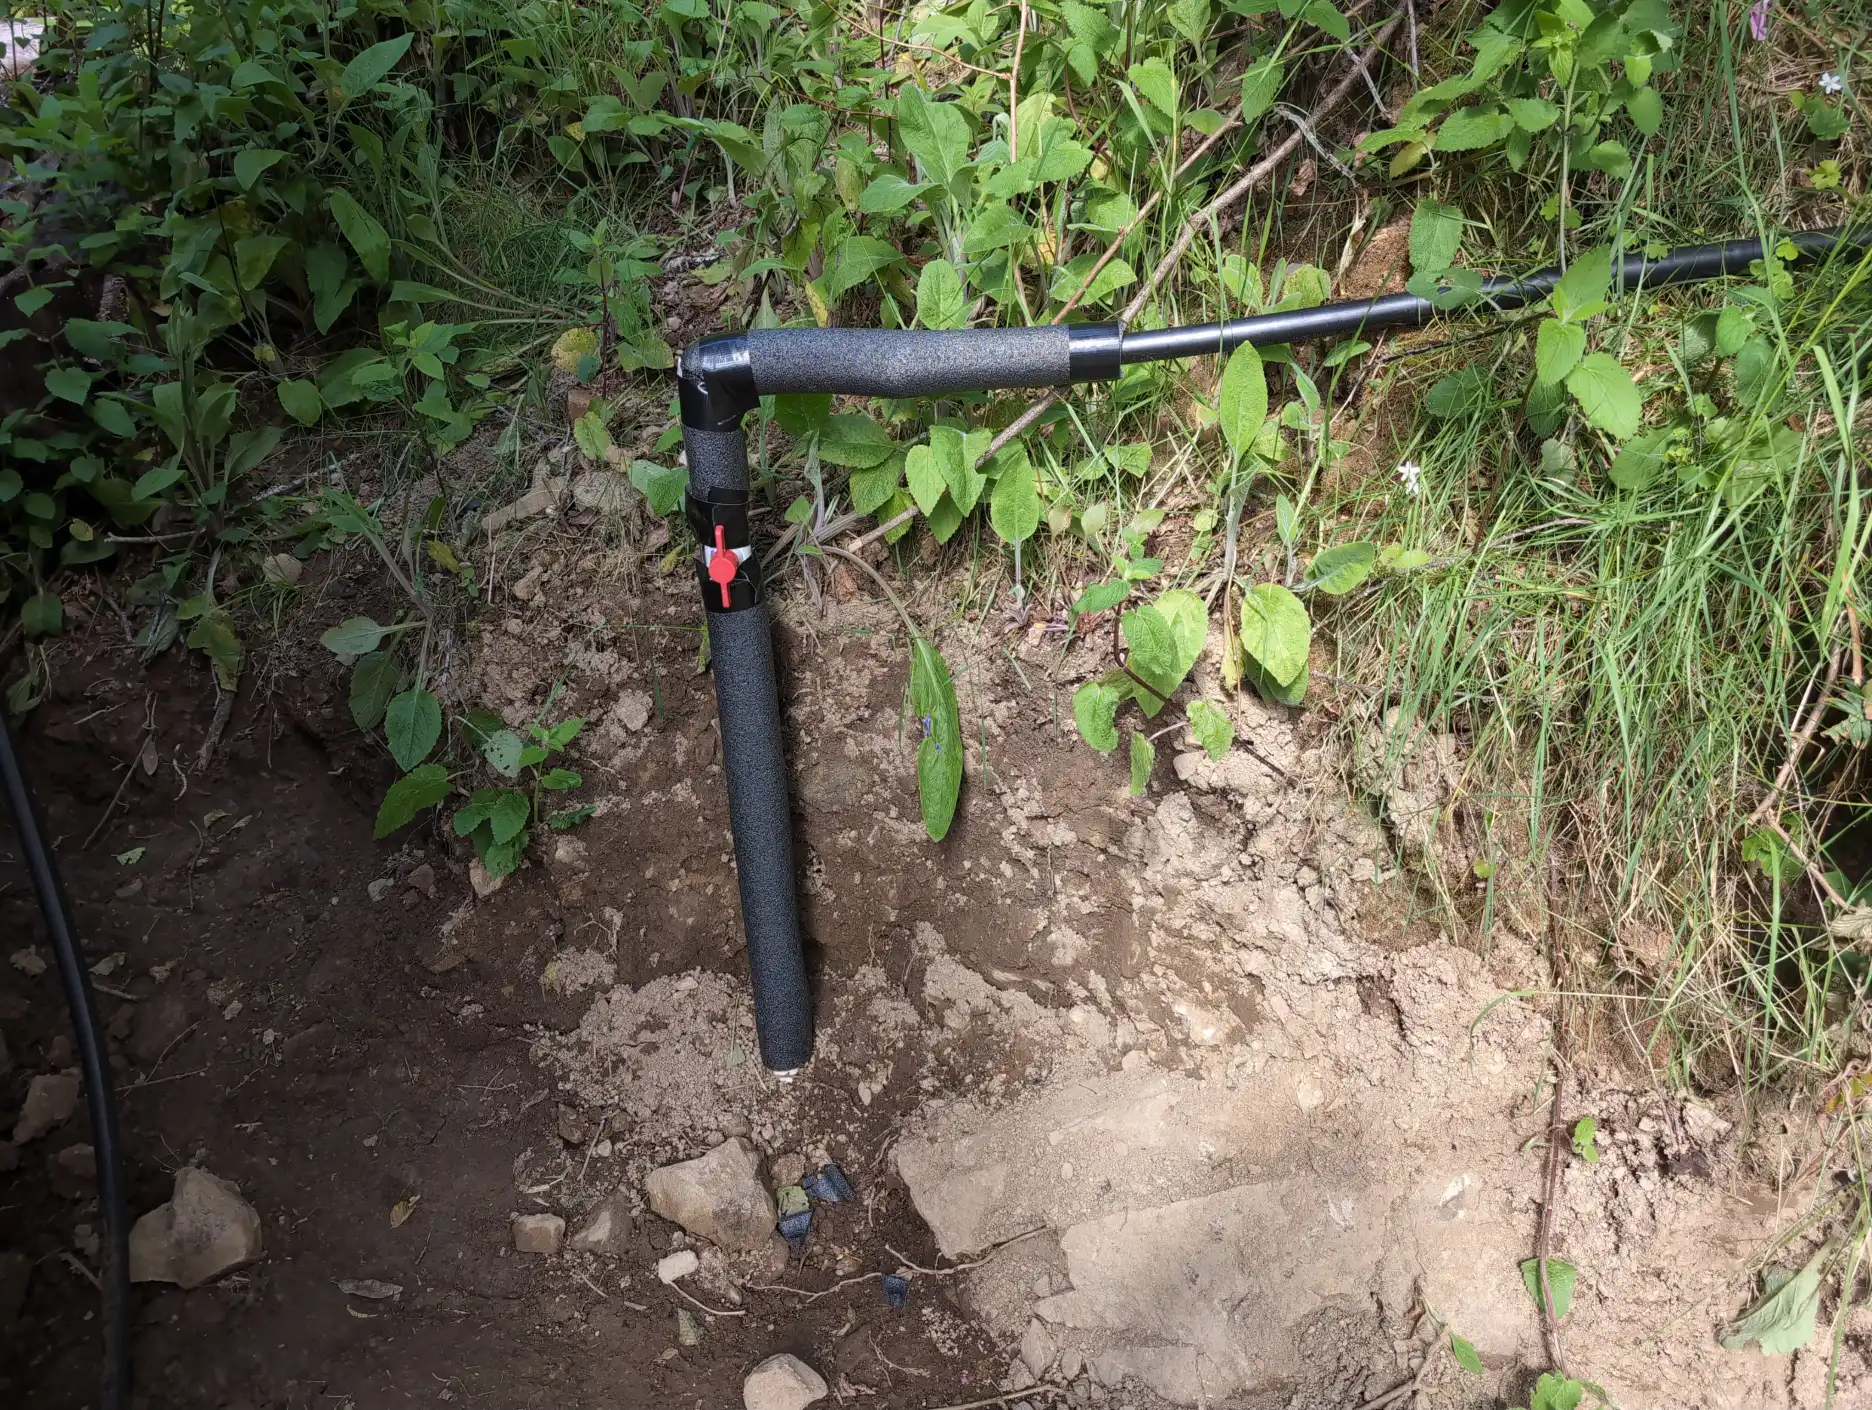
At the house end of the water system, the poly pipe is unceremoniously terminated to a PVC junction. Throughout the system are a multitude of redundant but convenient shutoff valves. Such a large quantity of shutoffs is not strictly necessary but helpful for maintaining improvised water systems.
At the house, there are 100’ of PVC supply lines feeding the house, 4 hose bib locations, as well as a future bathhouse site. Plumbing in and around the house with PEX would have been better than PVC, I suppose. The extra material cost, both in the tubing and connectors, seemed unjustified.
Here is an approximate list of the materials used:
- 5 1” poly bulkheads.
- 600’ 1” poly pipe.
- 4 1” poly pipe to PVC fittings.
- 1 500 gallon storage tank.
- 3/4” brass float valve with float and adaptor to the 1 1/2” inlet tank bulkhead.
- 1 plastic storage tote for spring box.
- Poly or fiberglass sheet/barrel section to use use as a collector bulwark.
- Around 30’ of 1” PVC pipe, between the collector, spring box, and storage cistern manifold. More to plumb the house.
- About 6 1” PVC ball valves.
- Lots of other PVC fittings.
- Pipe insulation to keep light off some of the more exposed PVC sections.