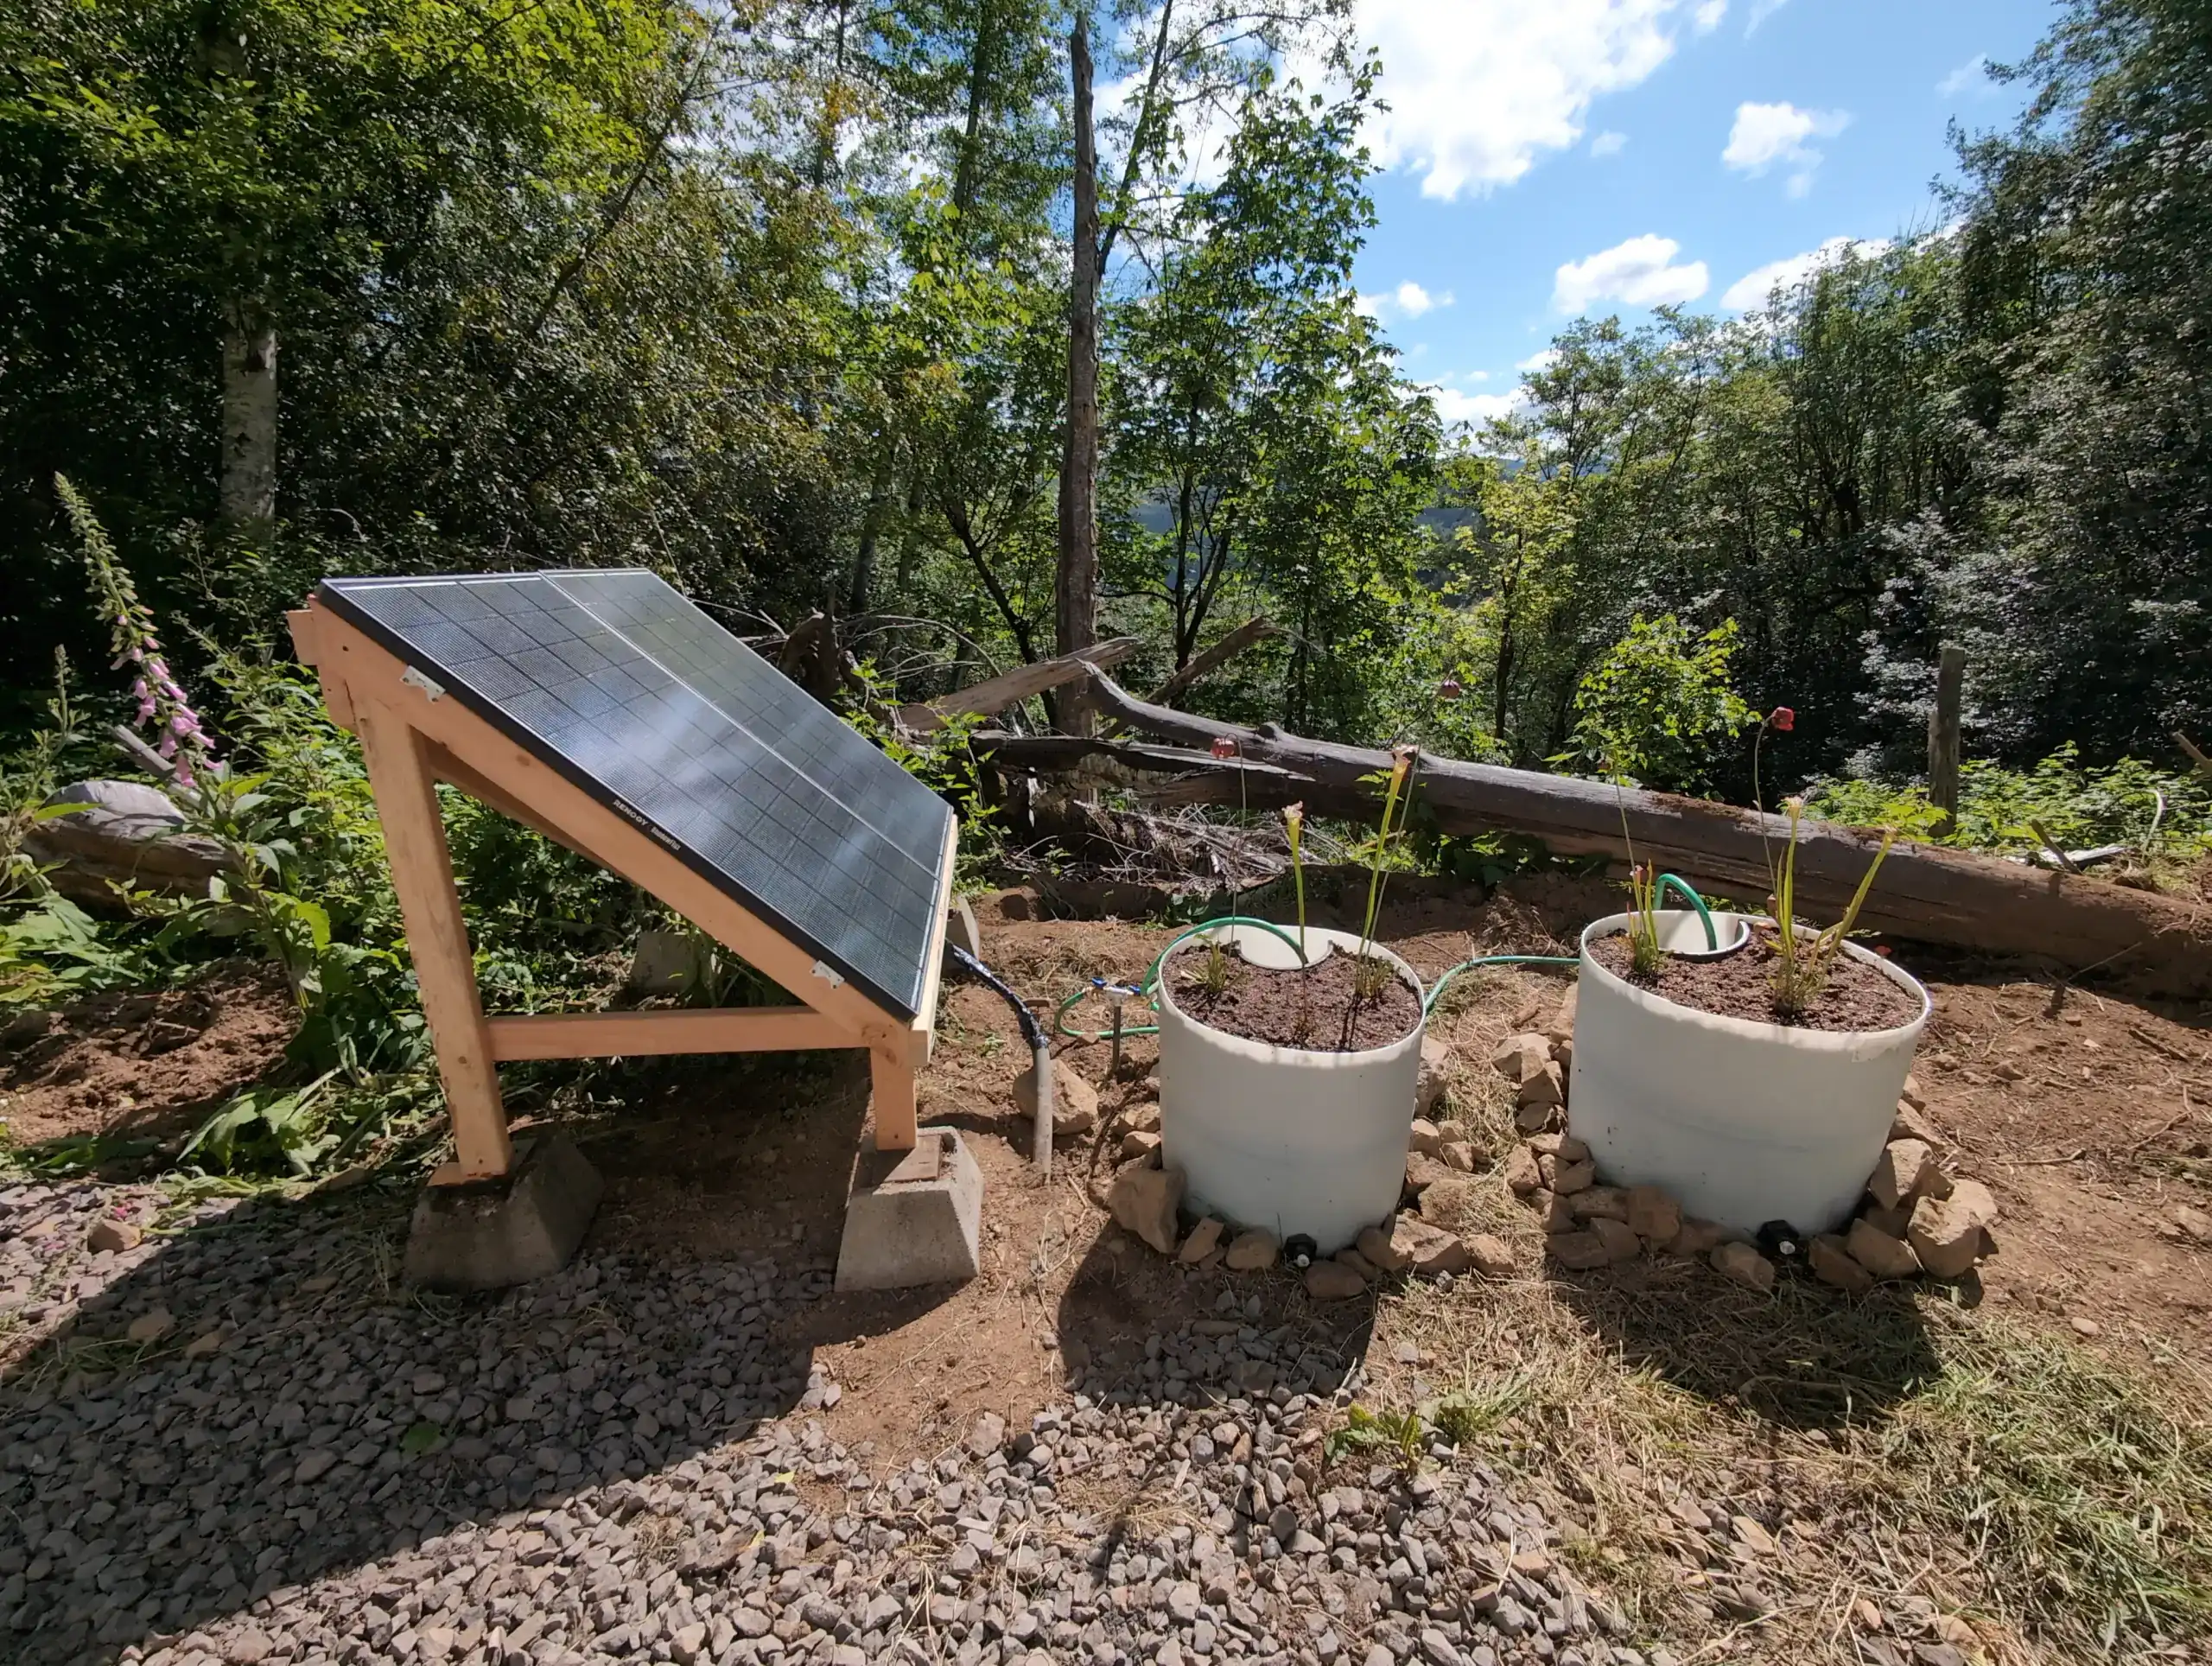
For years, I have kept Sarracenia in Oregon without spending a minute watering. I visit the plants (and family) once or twice a year and occasionally re-plant, but otherwise perform little maintinance.
This spring, I set up two new containers, as well the gravity-fed spring water system that now supplies the property. Here are snapshots of the materials and techniques involved.
Supply float valves
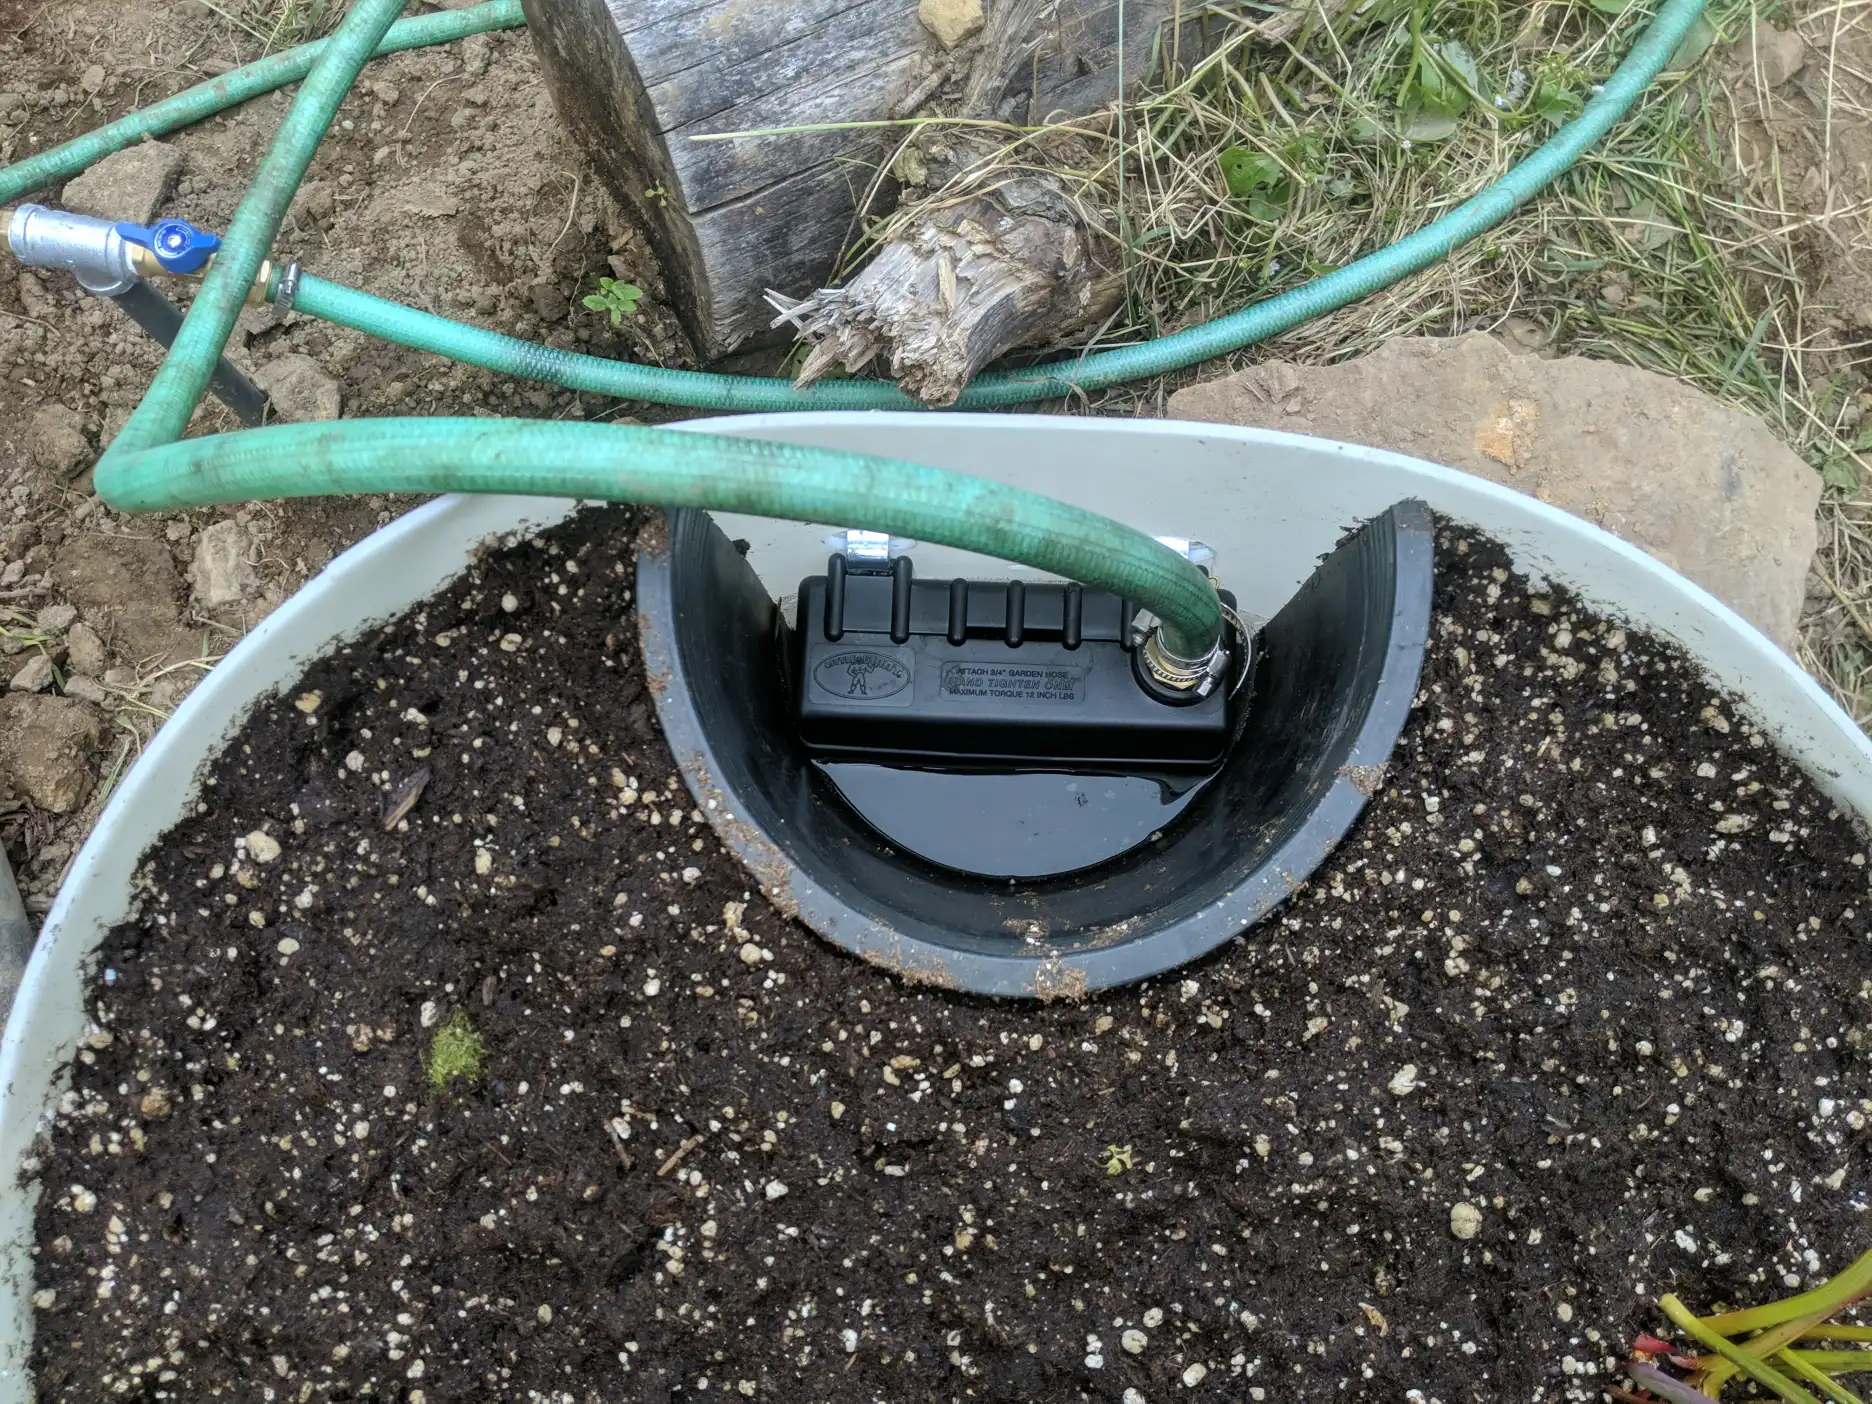
These Little Giant float valves ensure that the Sarracenia containers stay damp in the dry season. They are mounted in cavities that are maintained free of potting material by halved 3-gallon pots. The pots are easy to cut using tin-snips.
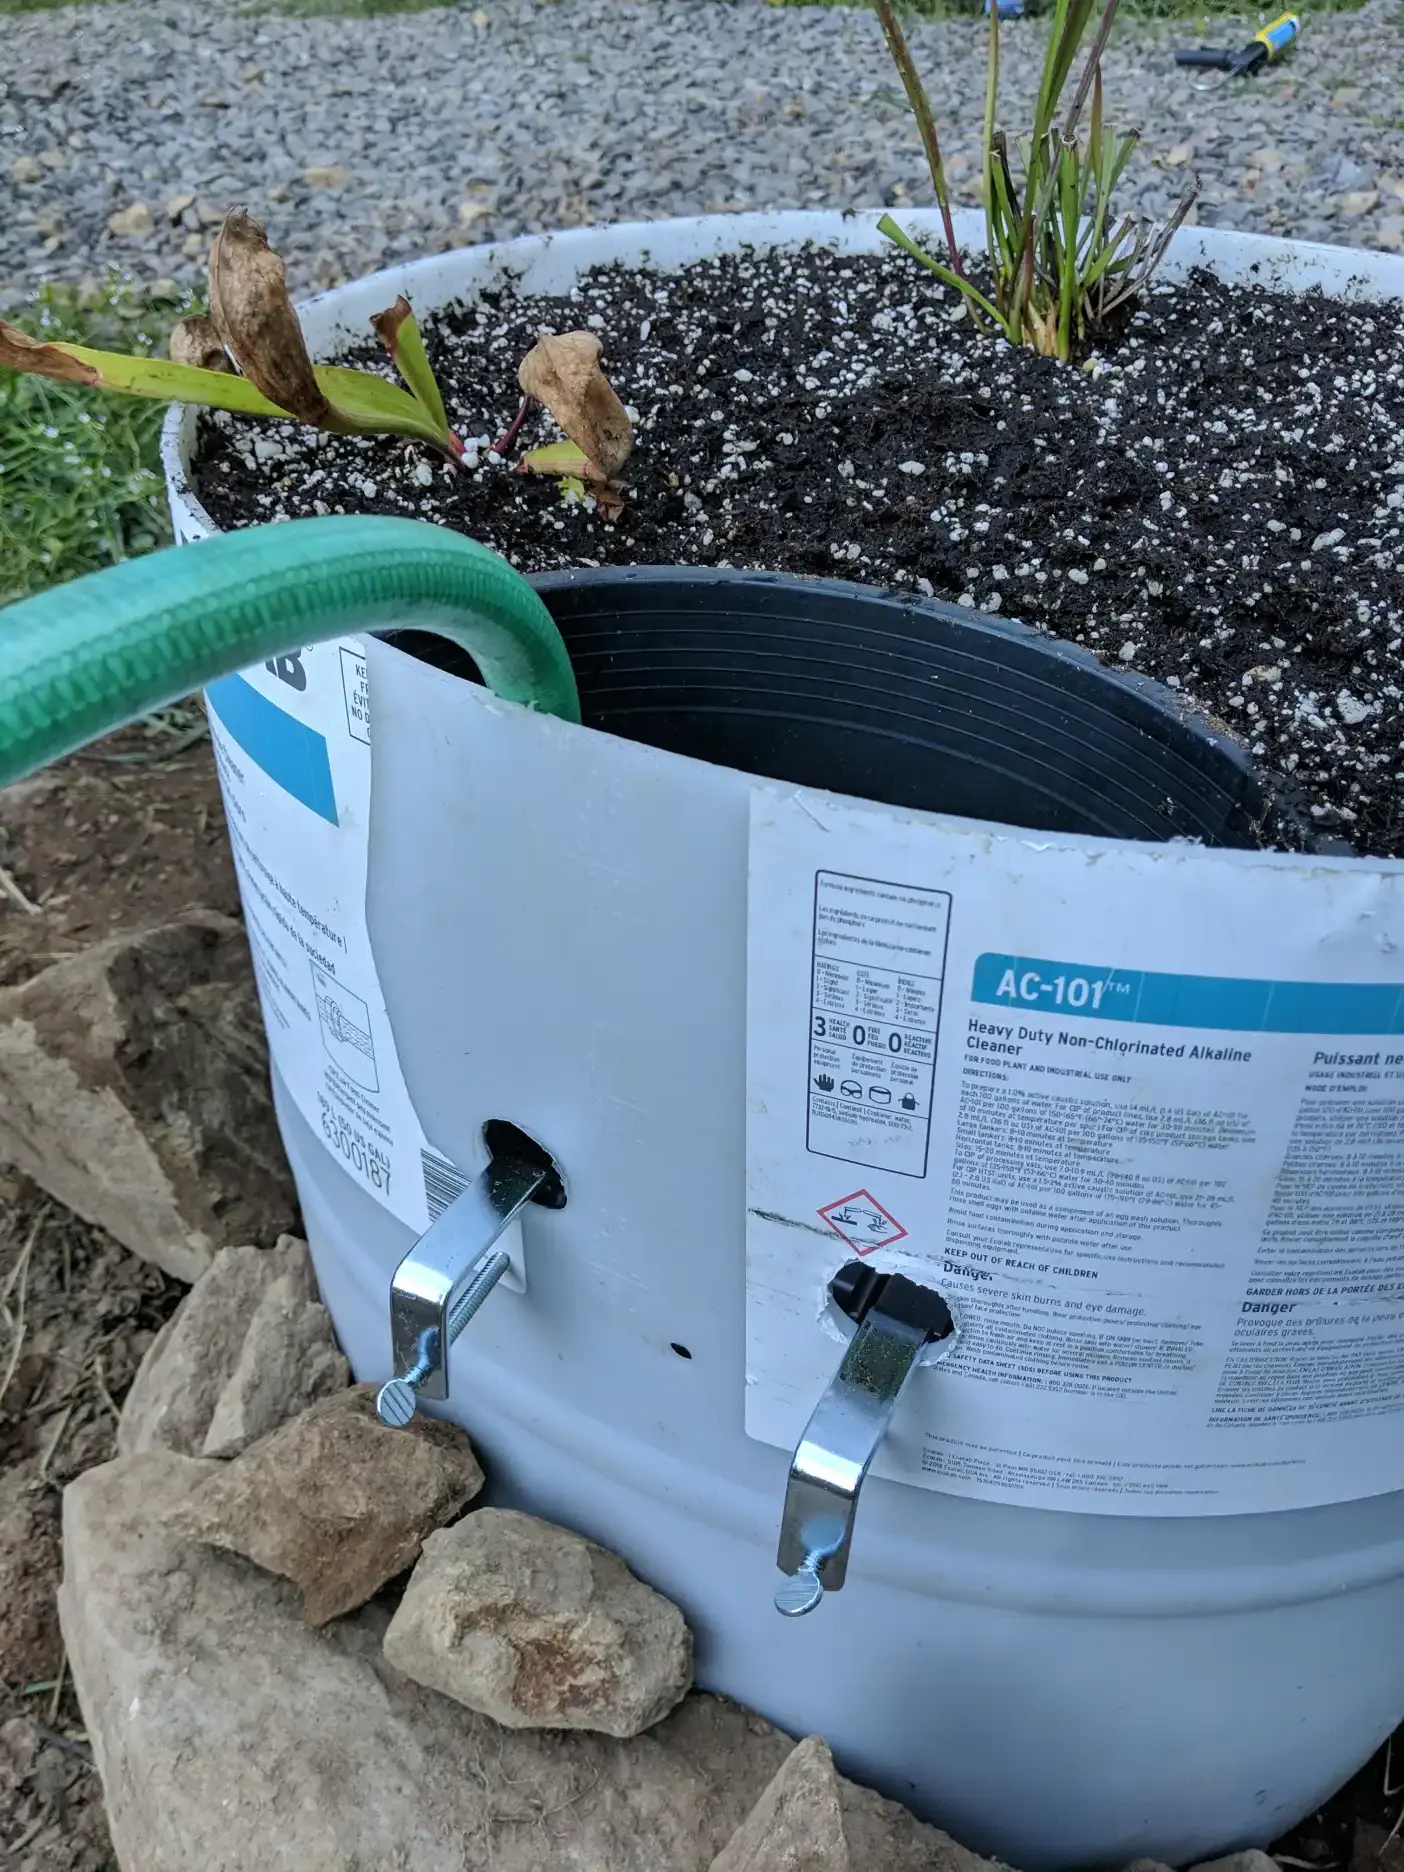
There are two holes drilled in each container to accommodate the valve mounting hardware, with a third perforation functioning as a rain overflow. This type of float valve isn’t the least expensive on the market, but it is relatively compact, robust, and easy to install.
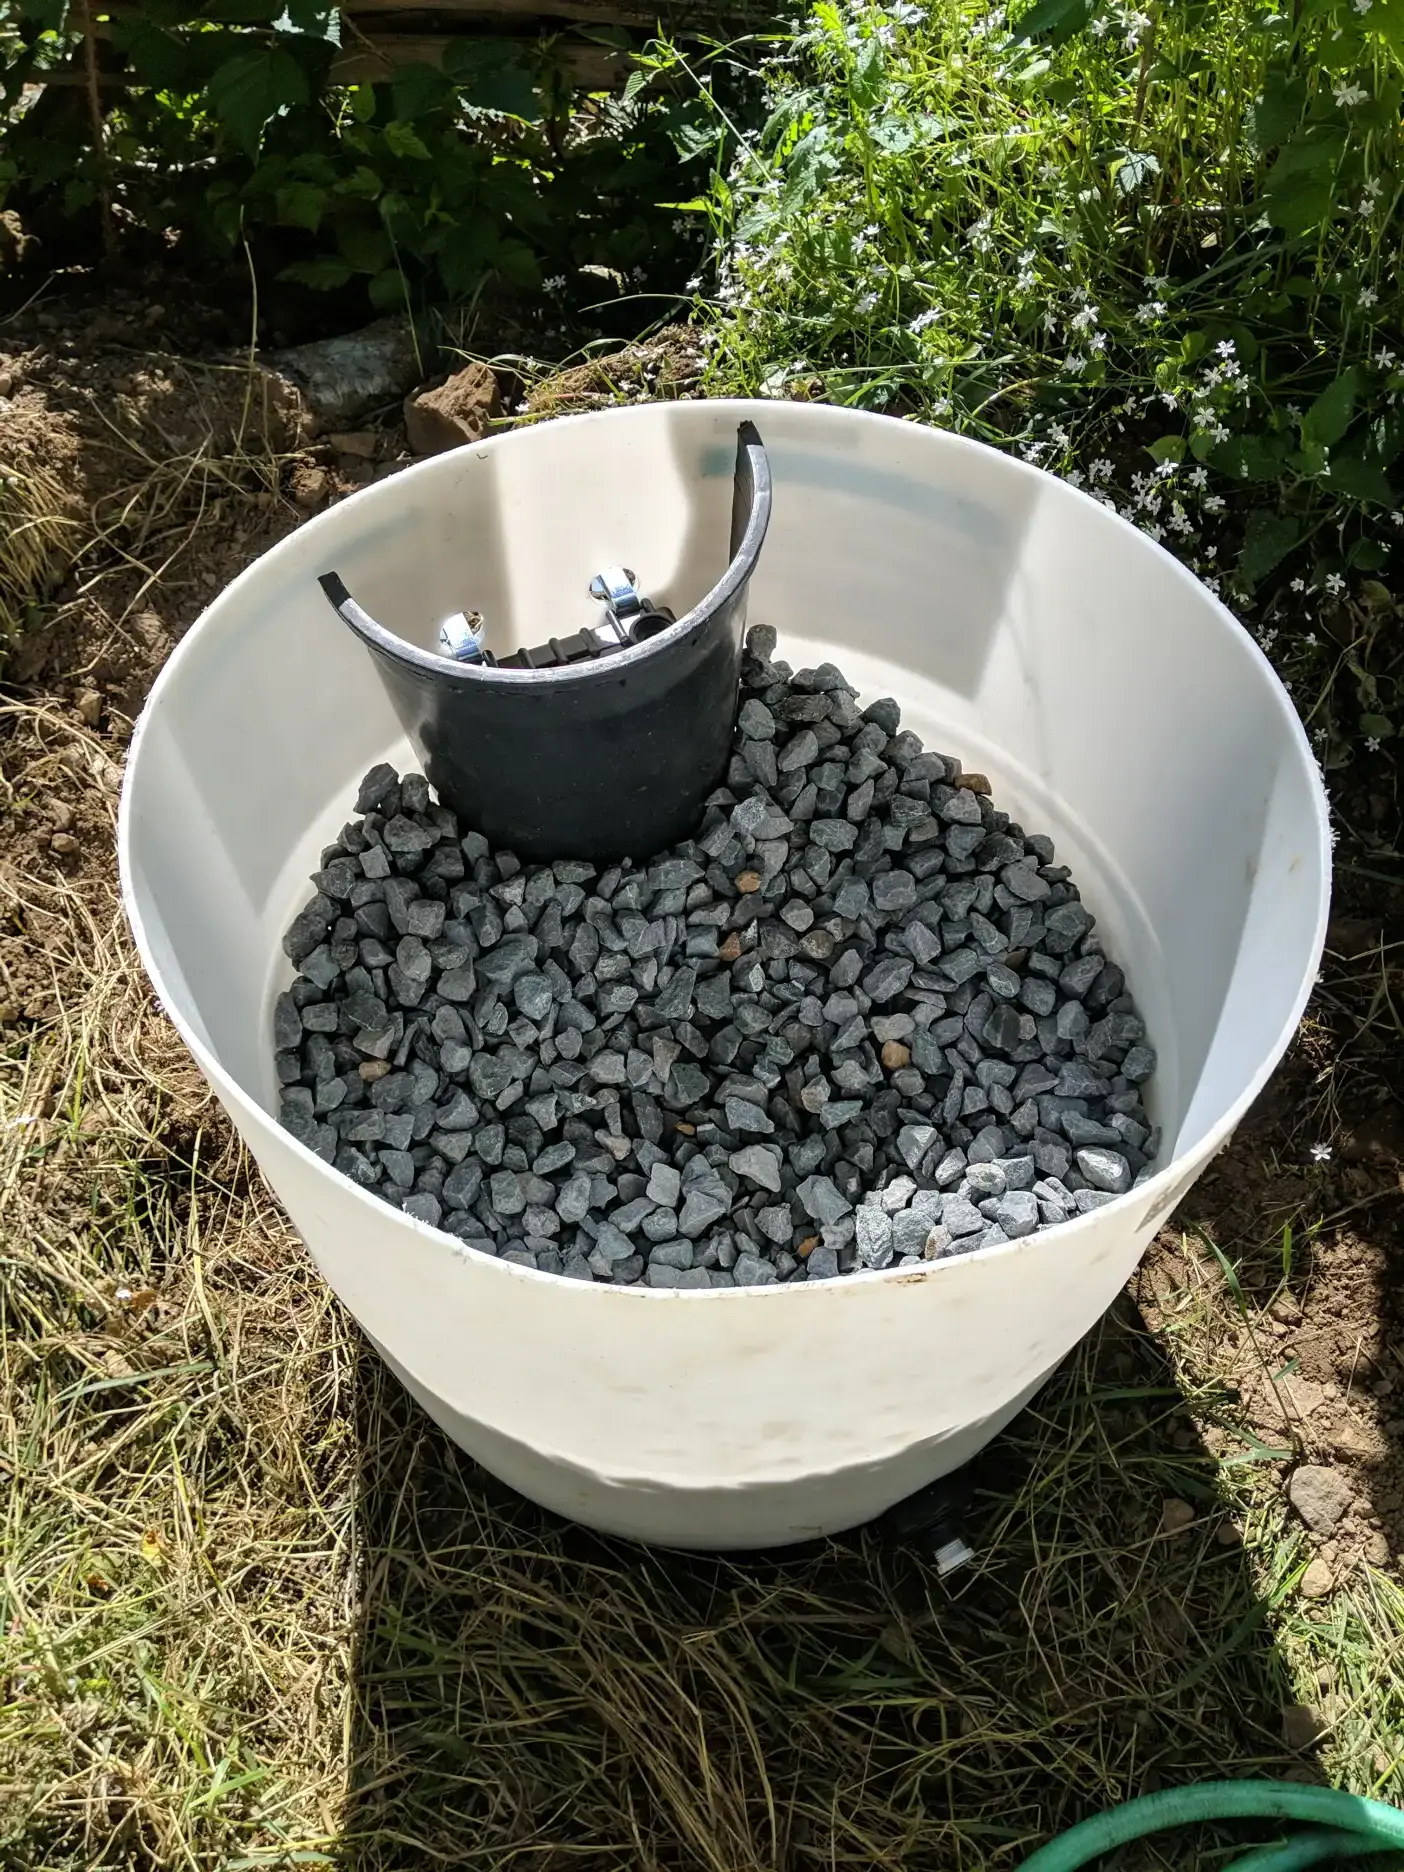
The 3 gallon pot halves are anchored in place by the clean gravel that fills the bottom of the containers. The gravel functions as cheap fill, mostly, while also keeping the peat mix out of the fill cavity, and facilitating drainage when the drain plug is removed.
I have prepared other containers using pumice in place of the gravel. The pumice has the advantage of weighing significantly less than gravel. These containers would be nearly impossible to move without first emptying the gravel.
Drain and winter care

The drain consists of a simple PVC threaded plug that is fitted into a poly bulkhead. This bulkhead is for 1/2” plumbing, which provides more than sufficient flow for the application. It is easy to install this style of bulkhead in most containers, using a hole saw to make the appropriately-sized perforation. It is also helpful to have a pair of large pipe wrenches on hand to tighten the bulkhead in place.
In the winter, the plug can be removed to reduce potting mix saturation. In general, the plug can be safely removed and the float valve supply lines closed from around December to March/April in southern Oregon.
Other considerations
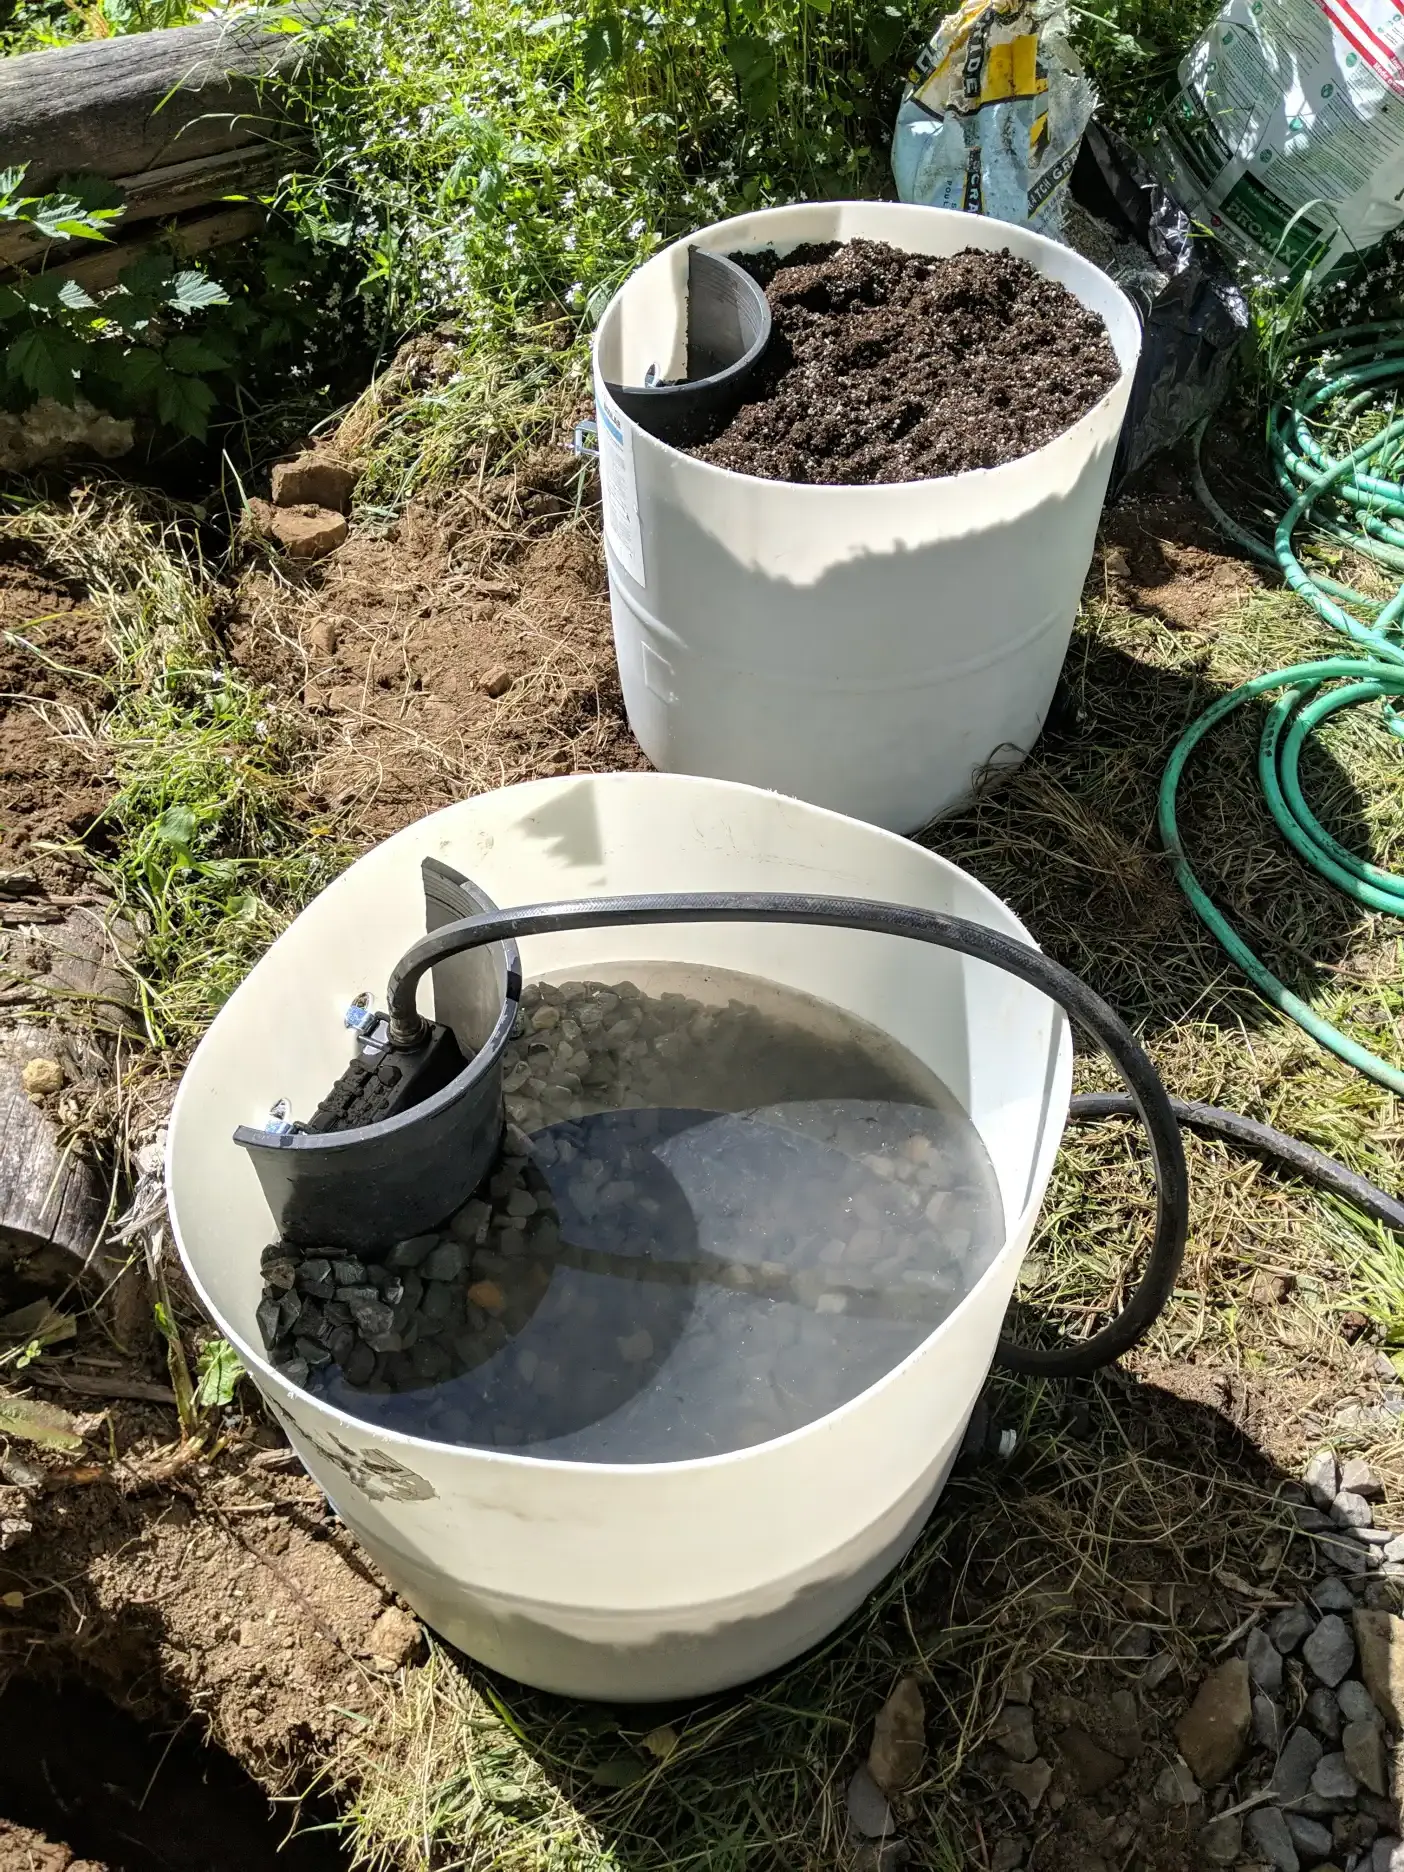
Here you can see the water level I was aiming for when determining how low to mount the float valves. The idea is for only the bottom of the peat to touch standing water.
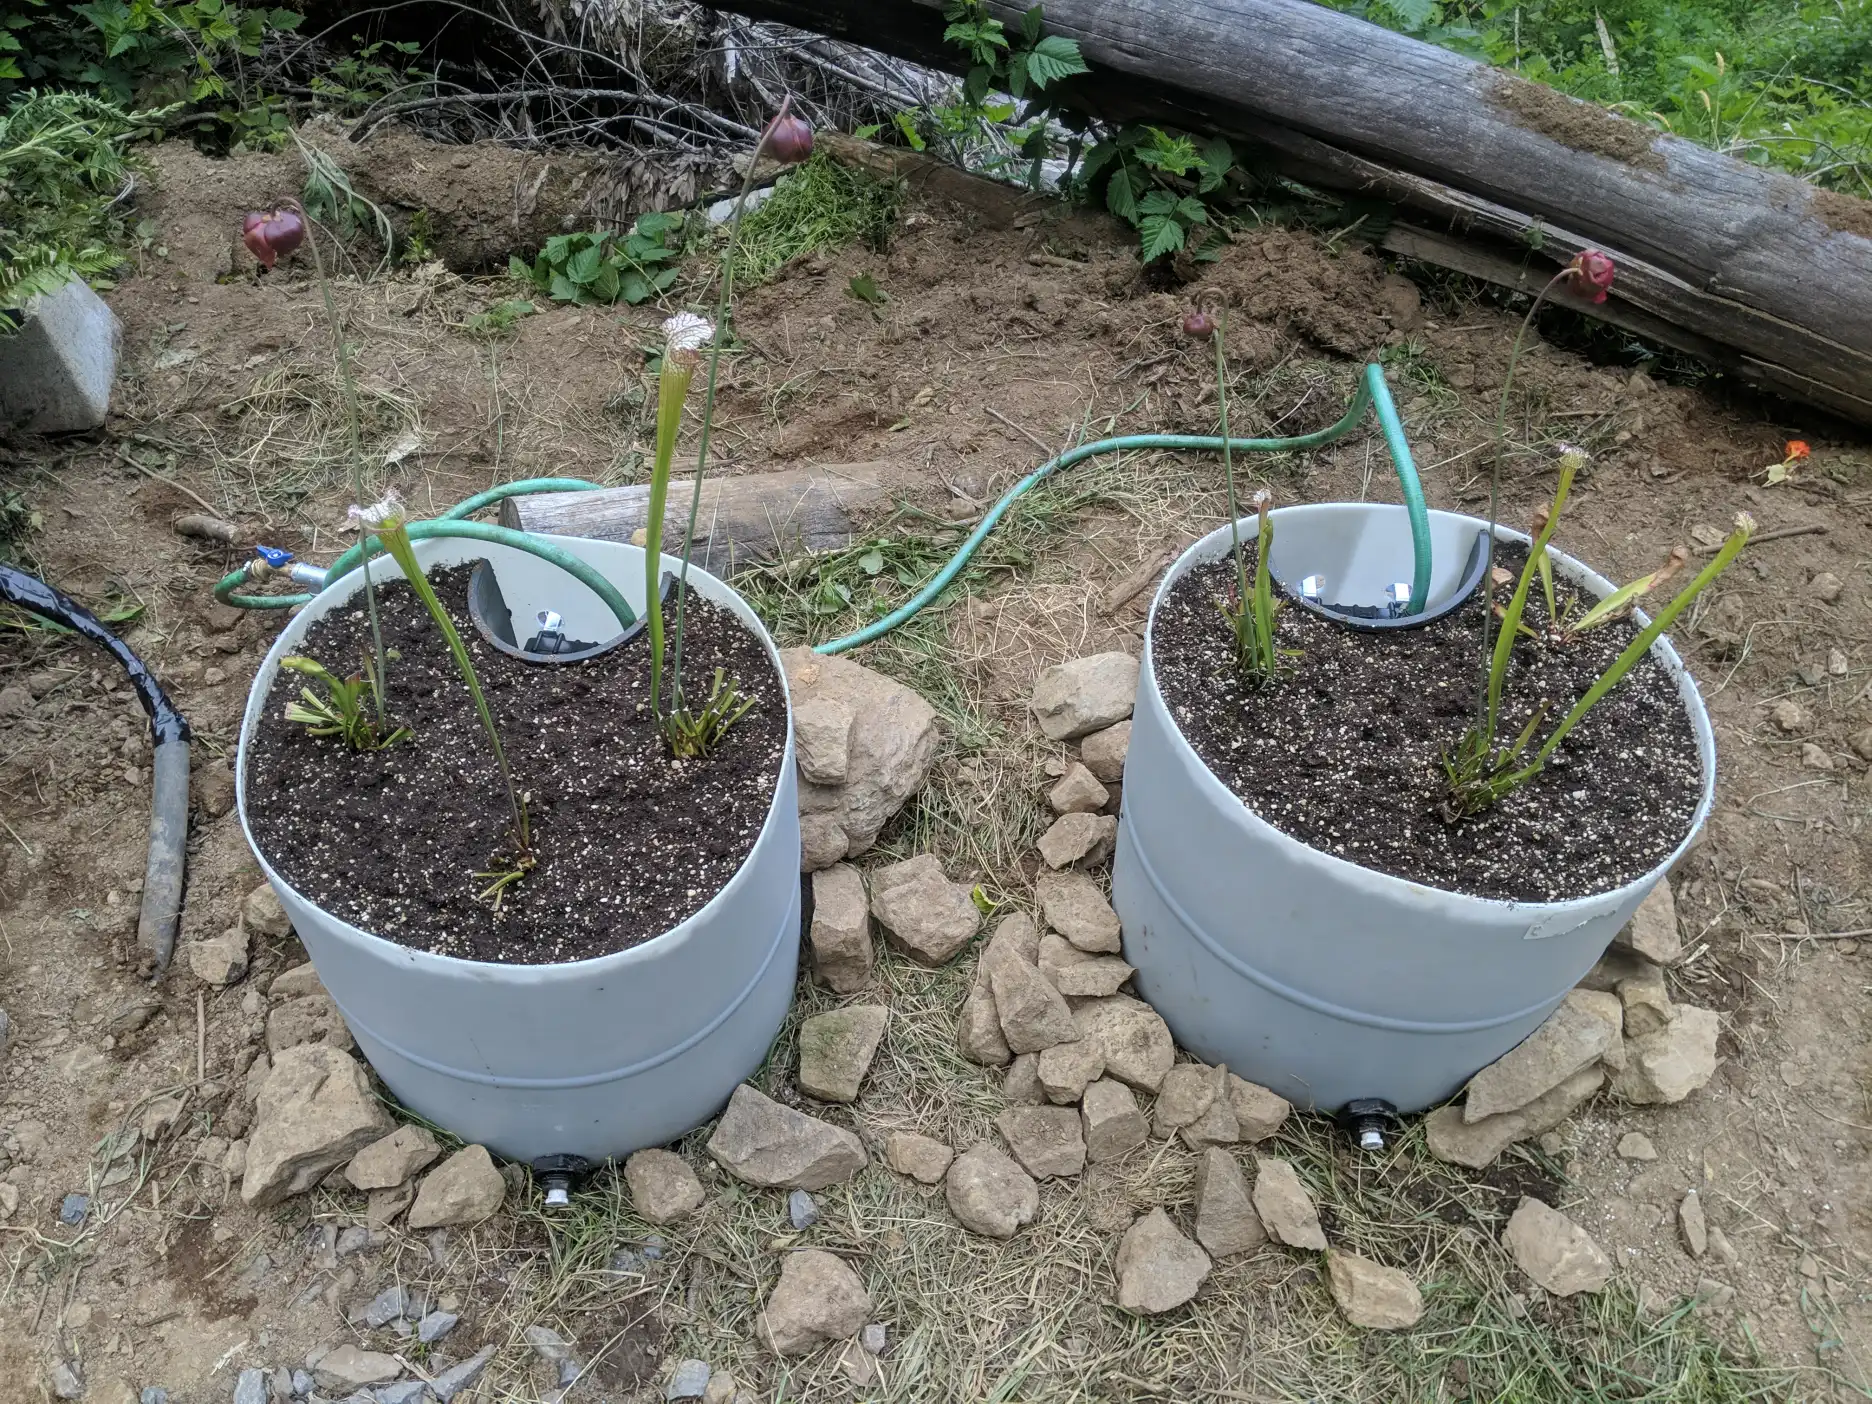
Here are the completed bog containers, now filled with a peat/perlite mixture and planted.
In other installations, I have used plastic or rubberized commercial livestock troughs in the same manner. Here, the containers are modified 55 gallon poly drums. A local brewery bought industrial cleaning products in the vessels before discarding them in my direction. The drums are easy to cut in half using a circular saw.
I wouldn’t necessarily purchase this sort of container for growing Sarracenia, but am pleased with the results given the cost.
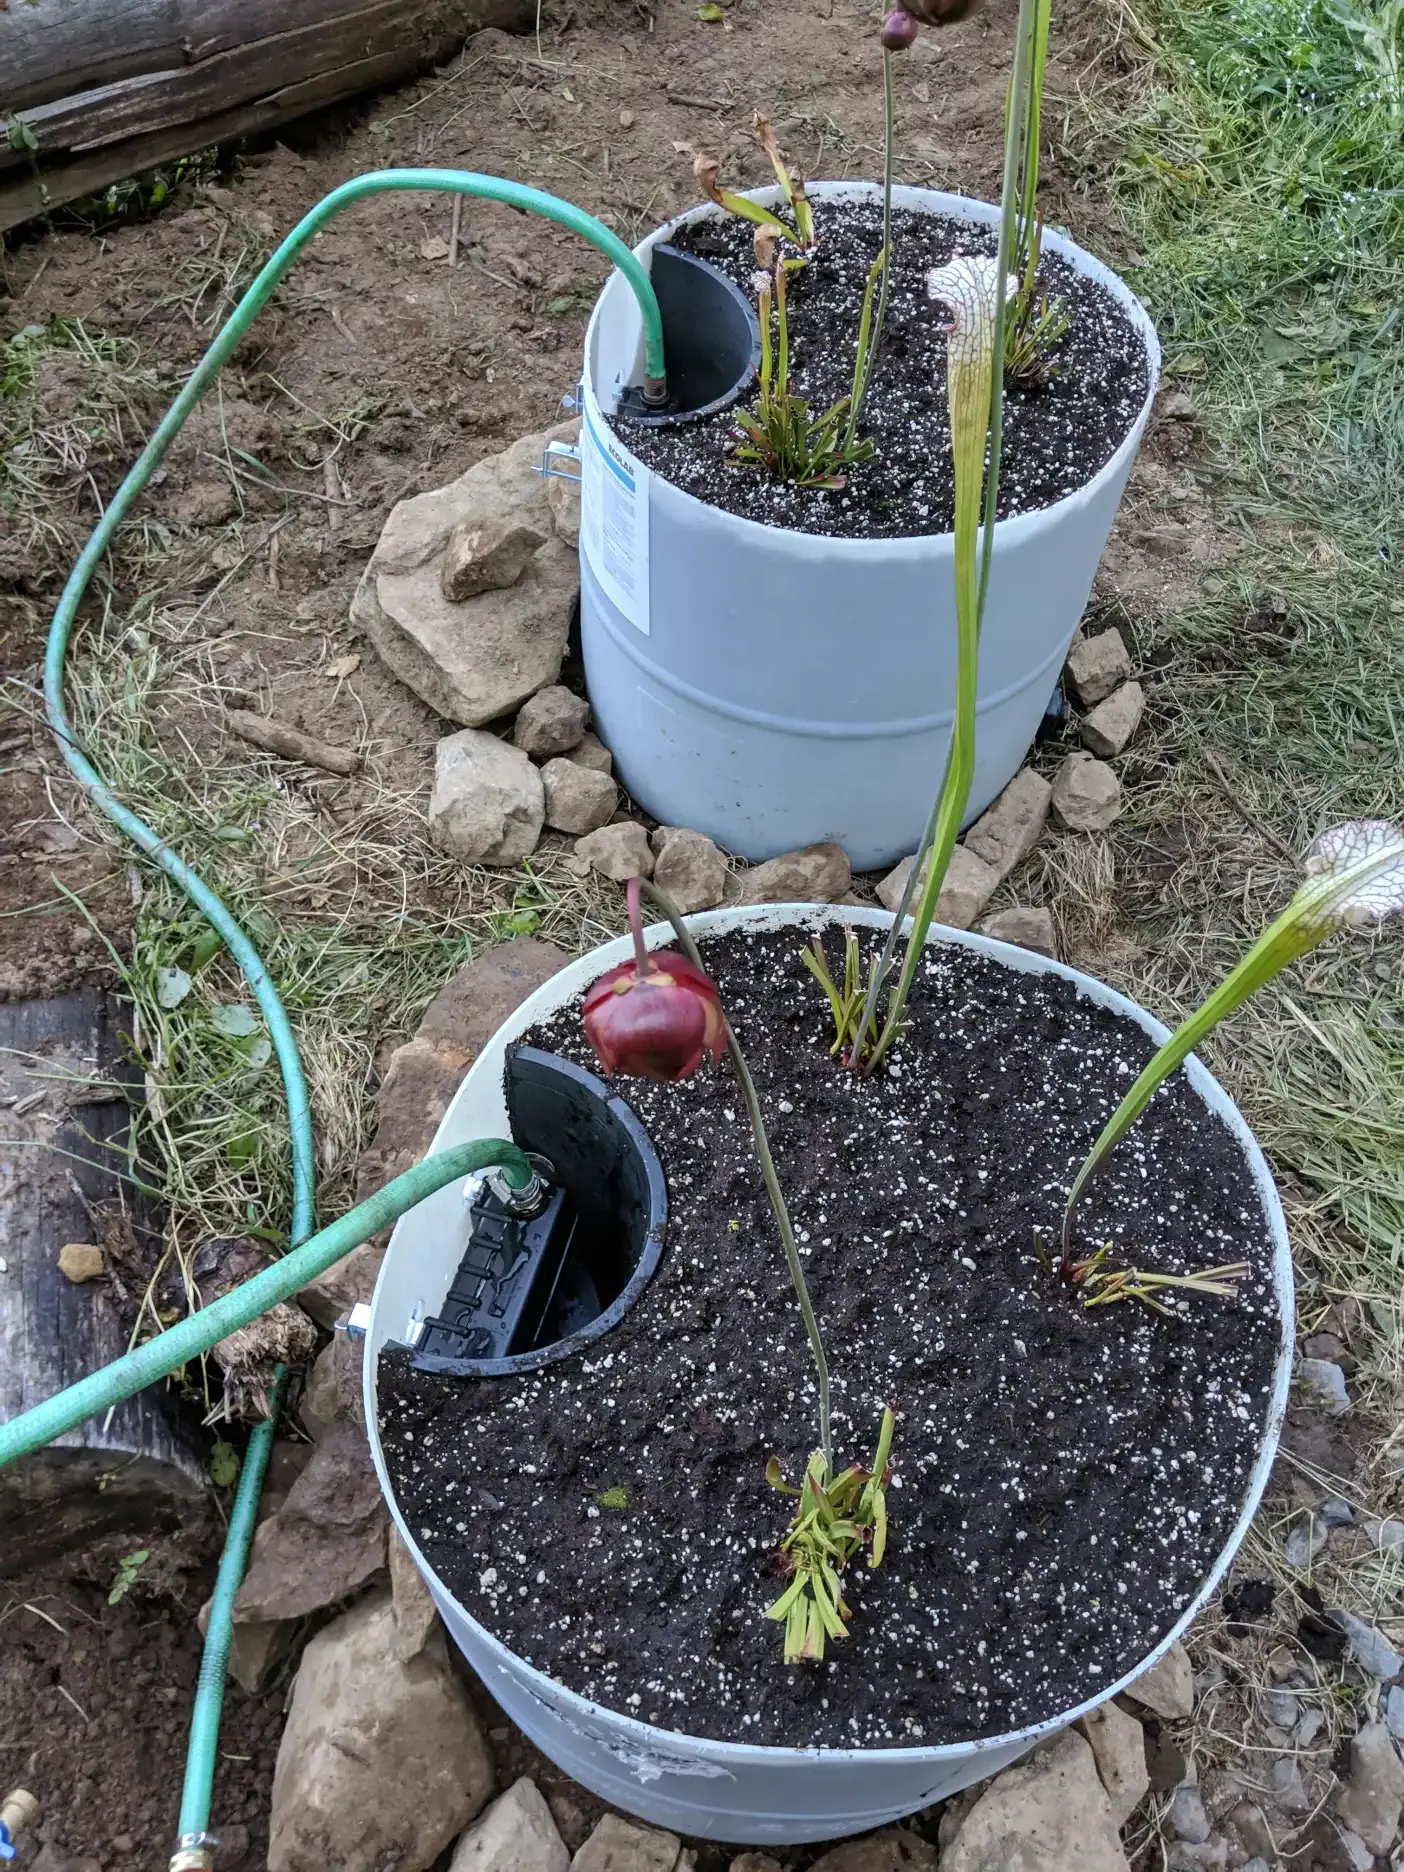
I chopped up an already-mangled garden hose to make the supply line connections to the float valves. Installing rigid plumbing may have been better in some ways, but this approach was certainly expedient. The Little Giant float valves also are manufactured with garden hose thread on the inlet side, while the most appealing shutoff valves for the application were hose bibs, again, with garden hose thread.
Cost for each of the barrel bogs is as follows:
- Barrels: 55 gallon drums, free from a local brewery.
- Float valve assembly: about $20
- 1/2” poly bulkhead with PVC plug: around $12
- Hose ends to use with found garden hose: about $10
- About half a bale of Sphagnum peat per-barrel plus perlite - around $40
- Clean gravel - enough gravel to fill 3 5-gallon buckets - free from a local gravel yard. Normally, I use pumice in place of gravel, also mixing a substantial amount into the peat to reduce peat consumption. I didn’t have pumice on hand in this case or time to source it.
Tools used:
- Circular saw with wood blade
- Cordless drill
- Hole saw (2 1/8”, if I remember correctly)
- Drill bits - 1/4” and 1 1/2”, more or less
- Large pipe wrenches to install bulkhead
- Crescent wrench to install plug
- Screw drivers, needle-nose pliers and something sharp to install float valve and garden hose.
If you are curious where the water for the plants (and the rest of the property) comes from, I have also collected notes about the gravity-fed spring water system.